Today we want to introduce you all to James Trenda, who goes by “I’m No Chef” on Facebook and Instagram. Some of you may already be familiar with his work, which has an instantly recognizable style. James has been working on launching (what promises to be) a fabulous blog of his own in the near future. In the meantime, he has been kind enough to share some of his glorious creations on some other popular Paleo sites such as The Urban Poser and Danielle Walker’s Against All Grain. We’re so pleased he’s been willing to share his recipe for Roasted Sweet Potato Gnocchi with us. Sit back, enjoy the beauty, and tuck this recipe away for later use (Pin this recipe).
This one time, in college, I tried making gnocchi. Let’s just say it wasn’t very good and didn’t look too pretty. Perhaps it was because the recipe called for regular sweet potatoes, which tend to get overly mushy. That, and the fact that I had no idea what it was or how to make it.
For those of you who are unfamiliar with gnocchi, it is an Italian/Middle Eastern dish traditionally made from a variety of starches, most commonly potatoes and flour. I’ll spare you a history lesson on gnocchi and its origin, mainly because it would just be a facade and also because its origin is somewhat unknown. Gnocchi, which I’ve heard pronounced three different ways (NO-kee, nee-AW-kee, or nee-OH-kee), is typically served as a main course with some kind of sauce.
I decided to try Japanese sweet potatoes for this recipe, but before I did that, I tried making it with turnips. Don’t ever do that. Ever. Then I tried with plantains, but I found them to be a little too stiff and they had a tendency to clump badly when I tried to incorporate the flour. Then I remembered the Japanese sweet potato, which I discovered for the first time a year or so ago while perusing the different varieties at my local grocer. They’re sweet, buttery, and starchy. And best of all, they don’t turn to mush if you over bake them. And as it turns out, they’re perfect for making gnocchi.
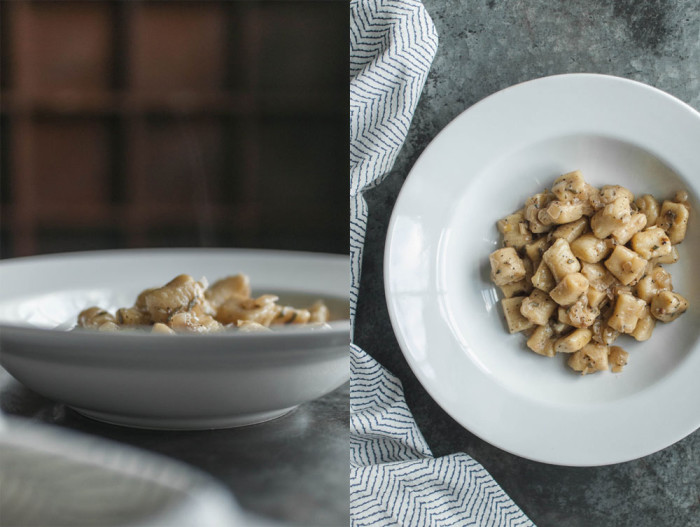
Gnocchi, much like pasta, pairs well with pretty much any sauce you got on hand or can whip up in minutes. The classic choices are pesto, tomato, and cream sauce. But you could simply toss them in a skillet and lightly toast with butter and some herbs and be quite satisfied. Since they’re sweet potatoes, they’re even good just by themselves, right out of the pot! For this recipe, I decided to go with a white wine sauce that I made from pan drippings, chardonnay, coconut cream, and fresh sage.
To make the wine sauce, it’s best if you have some pan drippings with which to start. I served this with grilled chicken for Valentine’s Day this past Friday, and used the pan drippings to start the sauce. I made it again on Sunday, but this time I cooked some breakfast sausage in duck fat, which I was finally able to find – sort of nearby – at a place called Dough in Asheville, NC. Then I refrigerated the cooked sausage for another purpose and continued with the leftover juices.
Now would probably be a good time to show you a picture of the sauce simmering away on the stove. But alas, I don’t have one for you.
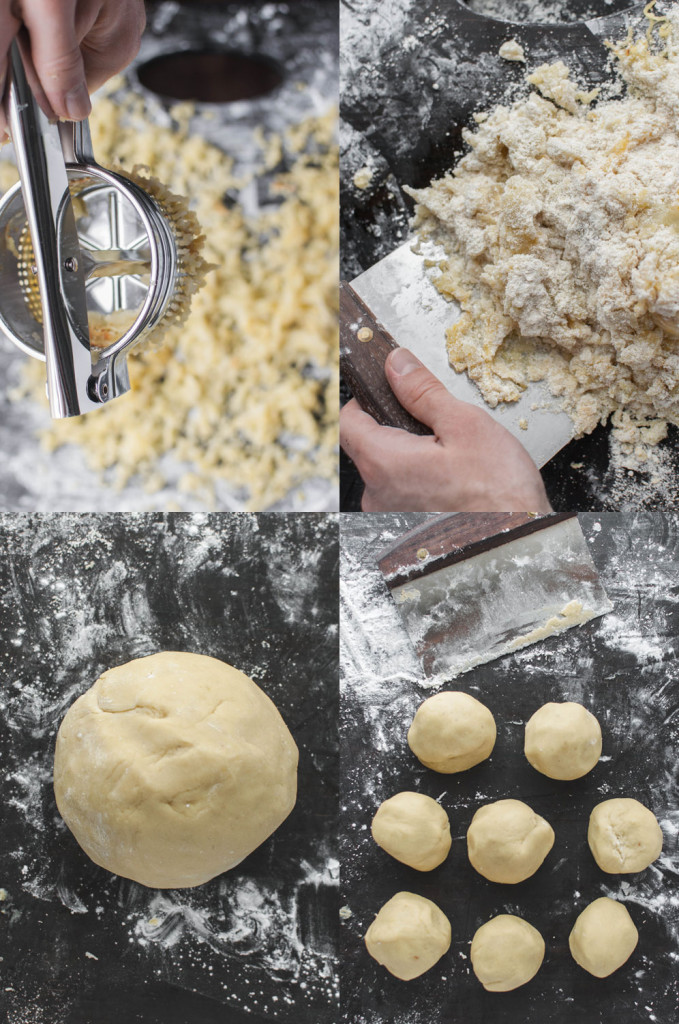
The first thing you’ll need to do is roast the potatoes and then immediately pass them through a potato ricer or food mill. I’ve tried both, and although both worked well, I really prefer the potato ricer over the food mill for this recipe. The next thing you’re going to do is let the riced potatoes cool down before pouring a beaten egg over the top, along with a cup of the almond flour/arrowroot flour mixture. I found it to be far less messy when I started with a bench scraper to initially bind the ingredients. It’s also a good idea to go ahead and get some water gently boiling in a large pot.
Once the initial cup of flour is mostly combined and clumped together, add a little more flour. At this point, you still want to try and use the bench scraper as the dough will still probably be too sticky to handle with your hands. It’s a good idea to keep a towel close by because no matter what you do, your fingers will mostly likely get dough stuck to them. Once most of the second round of flour is absorbed, go ahead and begin using your hands to gently knead the dough until all the flour is absorbed and the dough becomes smooth and somewhat elastic. If the dough is sticking to your fingers, then you need to add more flour. I’ve found the ratios I’ve listed in the instructions below to be pretty accurate.
Once you feel that your dough has reached the correct consistency, tear off a small chunk and roll it into a ball. Again, it shouldn’t be sticking to your hands at this point. Try rolling the ball out into a rope. If you’re able to form a smooth, elastic rope, then you probably don’t need anymore flour. When I say elastic, I mean that the dough should be a little stretchy. You’ll still be able to pull it apart if you manhandle it, but it should hold together nicely on its own and you should be able to pick the whole rope up without it falling apart. The best thing to do next is to cut off about a 1/2-inch to 1-inch piece of the rope and test it by dropping it into the boiling water. After about 90 seconds, it should float consistently at the top. If you can’t find it, then it might have disintegrated, which means the dough needs more flour.
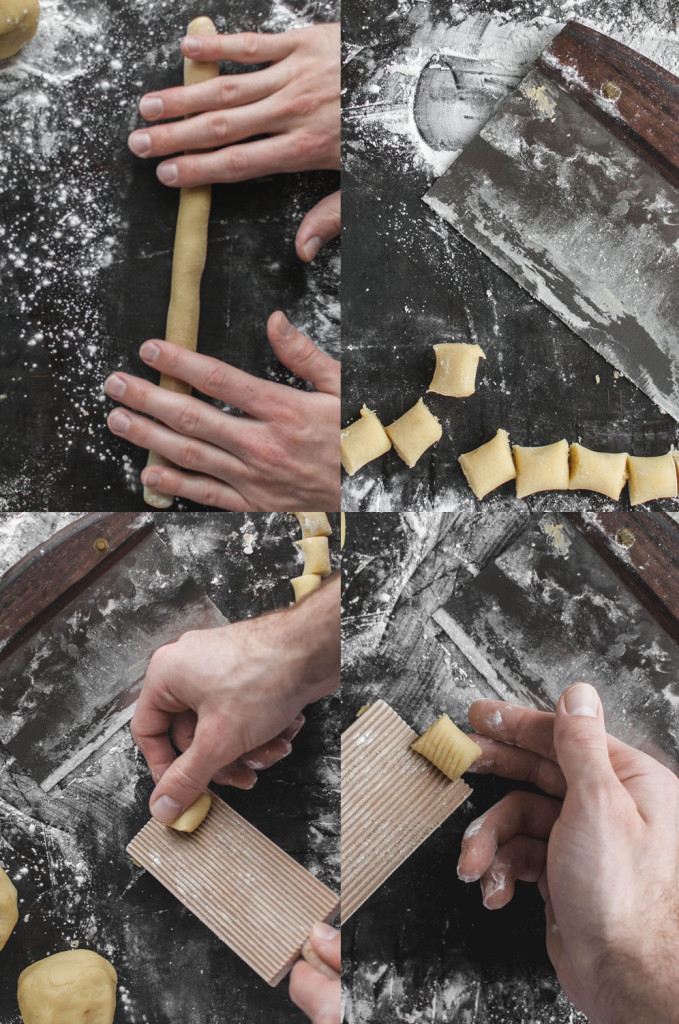
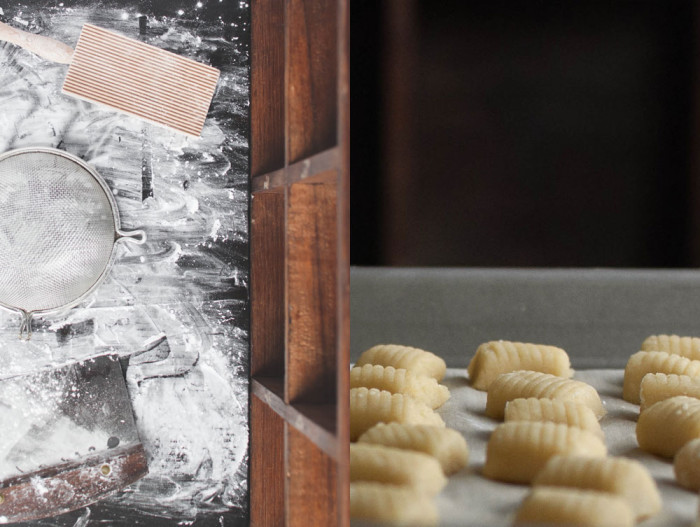
When you’ve reached the correct consistency and the dough looks similar to the one pictured above, it is time to divide and conquer. Using a floured bench scraper, cut the dough into smaller, more manageable balls. Then roll each one out into a rope that is about 1/2-inch in diameter. Tip: you can save time by rolling out two to three ropes, laying them together, and then chopping each one at the same time into 1/2-inch to 1-inch dumplings.
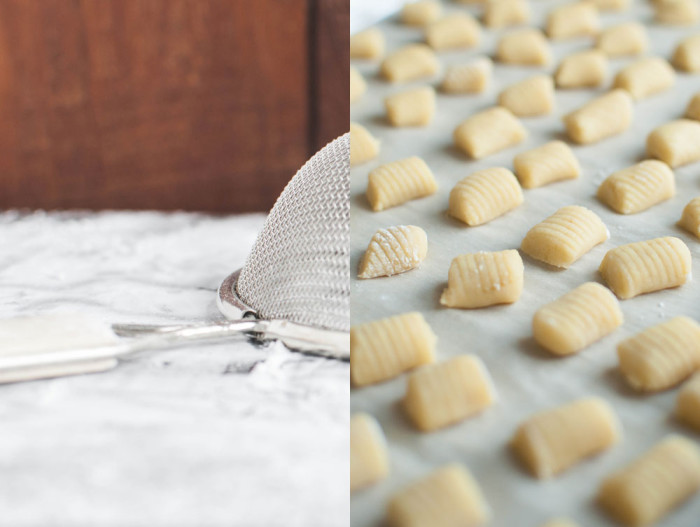
Once your dumplings are cut, it is time to form them into gnocchi. I found this wooden gnocchi board to be much more effective than a fork. They’re very affordable, and I recommend getting one if you plan on making this often. If all you have is a fork, I found it easier to roll when I lightly sprayed the fork with cooking spray and/or dusted it with a little arrowroot flour. You might also try dusting each dumpling with more arrowroot flour before using a fork or gnocchi board to make the little ridges.
Roasted Sweet Potato Gnocchi
Gnocchi, much like pasta, pairs well with pretty much any sauce you got on hand or can whip up in minutes. The classic choices are pesto, tomato, and cream sauce. But you could simply toss them in a skillet and lightly toast with butter and some herbs and be quite satisfied. Since they’re sweet potatoes, they’re even good just by themselves, right out of the pot! For this recipe, I decided to go with a white wine sauce that I made from pan drippings, chardonnay, coconut cream, and fresh sage.
NOTES: Make sure to weigh your potatoes before you begin in order to know how much flour to start with. Getting the right consistency for the dough isn’t difficult, but you might need to add a little more flour if you have more than a pound of potatoes. The dough should be smooth, slightly elastic, and should not stick to your hands. For each 1/4 pound (4 ounces) of potatoes over 1 pound, add 1/4 cup almond flour and 2 tablespoons arrowroot flour.
The gnocchi is best when fresh, but can be made up to 2 days in advance. Refrigerate cooked gnocchi in an airtight container until ready to use. You can also prep the gnocchi a few hours in advance. Place uncooked gnocchi on a baking sheet lined with parchment paper, cover with plastic wrap and refrigerate until ready to use.
Finally, most sauces can be made in advance as well. To reheat, warm the sauce up in a skillet over medium low heat. Toss in the gnocchi and cook for several minutes more until the gnocchi is warmed through. If using a cold sauce, such as pesto, reheat the gnocchi in a skillet over medium-low heat with butter or olive oil, then toss with the sauce and serve.
Ingredients
- 1-1.25 lb 1-1.25 lb 1-1.25 lb Sweet Potato, Japanese variety, about 2 medium sweet potatoes
- 1.75-2 cup 1.75-2 cup 1.75-2 cup Blanched Almond Flour, (Wellbee brand, if possible)

- .5 cup .5 cup .5 cup Arrowroot Flour, plus extra for dusting

- .5 tsp .5 tsp .5 tsp ground Nutmeg
- 1 1 1 Egg, Lightly beaten
Process
- Preheat oven to 450 degrees F.
- Prick the potatoes on each side with the tip of a knife or fork. Lightly coat them with ghee, duck fat, palm shortening, or other high-heat fat of choice. Place on a rimmed baking sheet lined with parchment paper and roast until fork tender, about 40-50 minutes.
- Combine the almond and arrowroot flours in a bowl and set aside. Lightly dust a clean work area with some extra arrowroot flour.
- Remove the potatoes from the oven and immediately, while they're still very hot, peel off the skin. Tip: Hold the potato with a clean towel in one hand to prevent burning yourself while you carefully peel the skin off with your other hand or with a paring knife.
- Immediately pass the potatoes through a potato ricer or food mill in a thin, even layer across a lightly floured work surface. Let the riced potatoes cool for about 10 minutes. Meanwhile, bring a large pot of water to a gentle boil over medium-high heat, and salt generously. Cook’s Note: If you will not be serving the gnocchi right away, prepare an ice bath in a large bowl, which will be used later to stop the cooking process of the gnocchi.
- Once the potatoes reach room temperature, drizzle the beaten egg evenly over the top of the potatoes and then sprinkle with 1 cup of almond/arrowroot flour and 1/2 teaspoon freshly grated nutmeg.
- Using a fork, or a bench scraper, gently scrape, fold, and chop the dough until it starts to come together in sticky clumps. Add remaining flour, 1/2 cup at a time and continue to work the dough with the scraper until it loses mosts of its stickiness. Once most of the flour is incorporated, begin using your hands for knead the dough until it all comes together into a smooth, non-sticky, semi-elastic ball of dough. To check, tear off a small chunk and begin to roll it into a rope. The dough should not stick to your hands and should not fall apart. Cut off a single dumpling and drop it into the pot with the boiling water. If the dough is the correct consistency, the dumpling will hold together and float to the top after a minute or so. If it comes apart at all, add a little more flour to the dough. Repeat this process until you've got the correct consistency.
- Form dough into a ball and cut into 8-10 smaller, more manageable portions.
- Roll out each portion into a rope that is 1/2-inch in diameter. Using a bench scraper, pizza cutter, or some other straight-edged tool, cut each rope into 1/2-inch or 1-inch pillows.
- Lightly grease a four-prong fork. Then place each dumpling across the tines of the fork and press down gently with the side of your thumb. Gently roll or curl the dumpling down the tines of the fork. Repeat with remaining dough. Alternatively, use a gnocchi board to make a better impression, pun intended.
- Cook gnocchi in small batches of about 15-20 dumplings. The gnocchi are done when they float to the surface and remain there for about 10 seconds, about 90 seconds total. If not serving right away, remove the gnocchi from the boiling water and plunge into an ice bath for about 1 minute to stop the cooking process. Shake off excess water and transfer to a baking sheet. Toss cooked gnocchi with a little olive oil to help prevent them from sticking together.
- Refrigerate leftover gnocchi in an airtight container for up to 3 days.
White Wine Cream Sauce
Ingredients
- 1 Tbsp 1 Tbsp 1 Tbsp Ghee, or pan drippings

- 1/2 1/2 1/2 Yellow Onion, large

- 2 cloves 2 cloves 2 cloves Garlic, minced or pressed
- 1 cup 1 cup 1 cup White Wine, dry, such as chardonnay

- 1 cup 1 cup 1 cup Coconut Milk, full fat, unsweetened

- 1 Tbsp 1 Tbsp 1 Tbsp Sage, fresh, about 10-12 leaves, chopped

- 1 1 1 Bay Leaf

- 1/2 tsp 1/2 tsp 1/2 tsp ground Nutmeg, freshly grated
- Salt and Pepper, to taste

Process
- In a large skillet over medium heat, sauté the onions in pan drippings or ghee until soft, about 5 minutes.
- Add the garlic and cook for another minute, stirring frequently.
- Pour in the wine and scrape up any bits stuck to the bottom of the pan. Cook until the wine is reduced by half, about 3-5 minutes.
- Add the remaining ingredients and simmer until thickened and slightly reduced, about 10 minutes.






There are no comments yet.