It’s been one year since we closed on our new house. I had a house in my mind that I really wanted for us, and most would think I’m nuts, but it included needing a lot of work. I follow Young House Love, and I love their current house, and all they have done to it. I kept telling Bill that I wanted to find our Young House Love house, and last summer we did! A 1950’s colonial, 12 minutes from our office, in the school district we wanted our kids to go to, and near a lot of our family members. The previous owners were in their 90’s, so you can imagine how much updating our house needed when we purchased it.
We’ve done a lot in the year that we’ve owned the house, it’s shocking actually, and Bill’s mom was just saying last night that we took on a house most people wouldn’t have. We had a vision. We could see it, and Bill got teary the first time we stepped foot into the house, so I always know that’s a good sign 😉
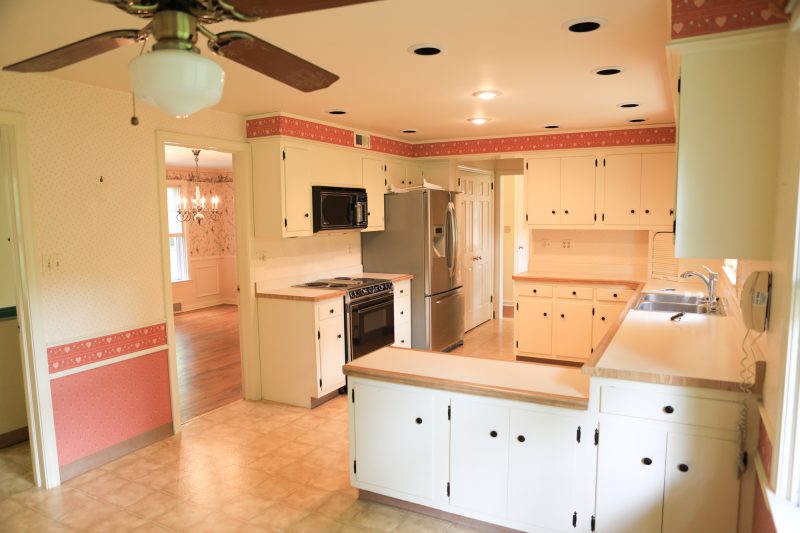
At some point we will get to all that we’ve done in the house, but for today we want to talk about the kitchen. For the last year we’ve lived with heart wallpaper, almond colored cabinets, ceiling and trim. Beige faux-stone linoleum that never looked clean, no matter how much you clean it, and brown rubber base molding. Yes, rubber floor trim… the type you see in doctors offices. Being food and lifestyle bloggers, (owning a spice company,) and having a professional food photography business, you’d think we would have made the kitchen a priority from day one. We actually didn’t. I started ripping down wallpaper the week we moved in, but never finished, and that was that for the whole first year.
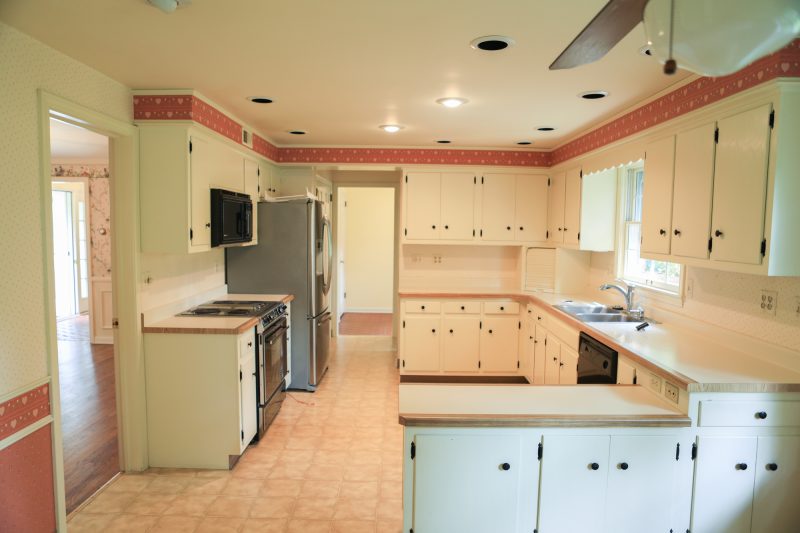
(How it looked the day we closed)
We were stuck on the kitchen. We had a contractor come out to discuss what we should do with the space, since it’s long but not as wide as we’d like; we couldn’t make a decision. We’ve talked about knocking down walls, and letting the kitchen flow into another room. We’ve also talked about doing a small addition off the back of the house. We plan to be in the house for a very long time, and the kitchen is so important to us, and really needs a lot of thought, planning, and of course money, so we just didn’t do anything. We focused on other things, but kept coming back to how the center of our home was such an unloved space for us.
We have a baby due in just over 2 months, so we knew we needed to do something, but clearly aren’t in a position to be building out our dream kitchen at this time. Bill and I always seem to come up with ideas when we are the beach, and one of the days we were sitting on the beach I said “you know, you don’t have time to paint the kitchen, maybe we should hire the guys who painted our family room for the walls and cabinets, and change out the hardware, and call it a day for now.” Bill loved the idea, the painters were able to squeeze us in quickly, surprisingly, and all of a sudden we had a minor, yet major project on our hands in a very short period of time.
Don’t miss the finished photos and build sheet (including approximate pricing) at the bottom of this post. Yes we’re sharing exactly what we bought, and how much we spent!
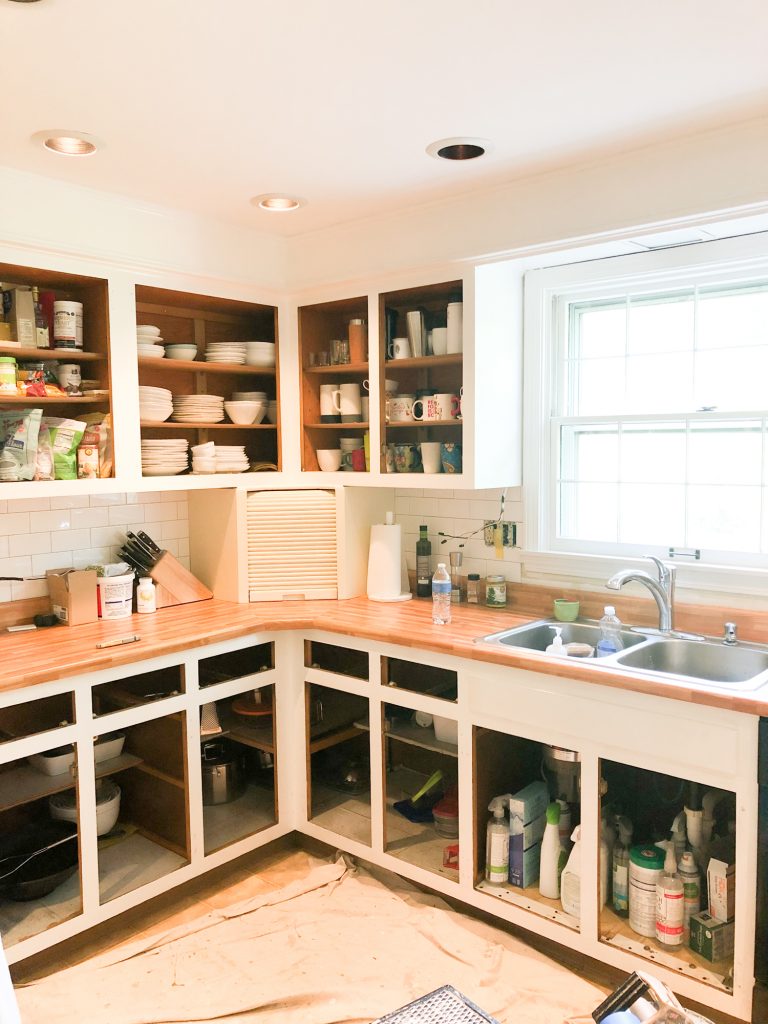
One of the first things we did was to wrap the counters in butcher block contact paper!
Bill is extremely handy. He can do just about anything, and I’m pretty good at helping him out, but being pregnant, there isn’t a whole lot I can help with, or that I should help with. All I did was pick out and order items we were replacing in the kitchen, and strip the wallpaper. With all that Bill can do, removing wallpaper is not something he’s keen on. Rightly so, it’s a tedious job, and oddly I do well with it, because I don’t have the best patience when it comes to that type of stuff.
I felt comfortable removing the wallpaper, because I only use hot water, dish soap, and sometimes vinegar. Typically I will peel the outer layer of wallpaper off, and then just use hot water to remove the backing. The wallpaper in our kitchen has been the worst in the entire house, and the outer layer wouldn’t peel, so I had to work extra hard to get it off. I did use the wallpaper roller with teeth to perforate the paper, and then I had a mixture of hot water and Seventh Generation dish soap, and used a rag to saturate the paper. I made sure I wore gloves the entire time as well.
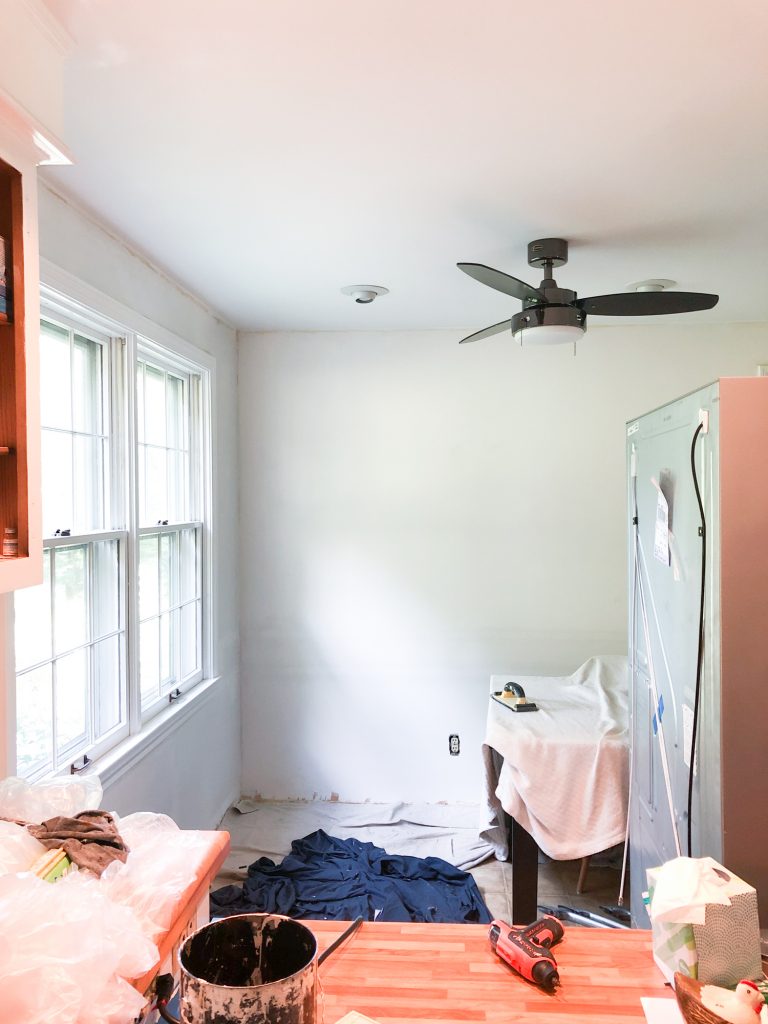
While I was removing wallpaper, Bill was removing the old floor trim, and cleaning up the walls in preparation for the painters. The painters came in, and painted the ceiling, walls, and cabinets for us. They were done in two days, and it was a HUGE help. We used the colors we have used in the majority of our house, Chantilly Lace for our trim, and Edgecomb Gray for the walls, both are by Benjamin Moore.
I ordered a new ceiling fan from amazon. It was inexpensive, had good reviews, and was small. Everything I wanted. I also ordered new cabinet hardware from amazon. Bill wired in the ceiling fan, and I put on all of the new cabinet knobs, and he did the new hinges.
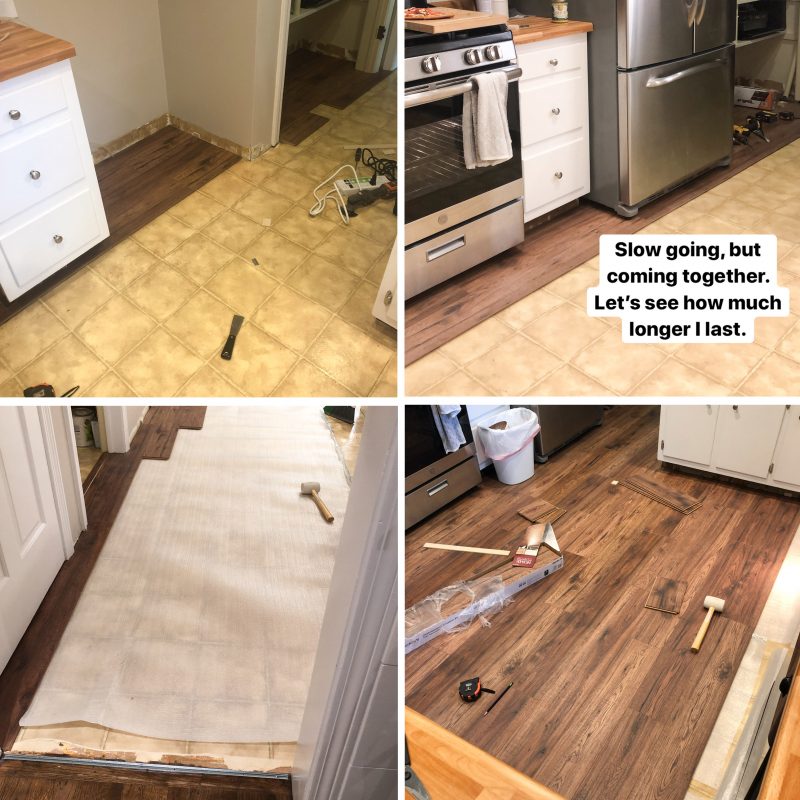
Once we saw how nice everything was looking, we knew we couldn’t stop there, so we were off to home depot to get a click flooring that would hopefully match the real hardwoods in our house. We got what seemed like a million samples, and none matched perfectly, but we did our best to find one that was close enough. Bill also installed the flooring (in one weekend no less), and then he did the new floor trim. He is a wizard.
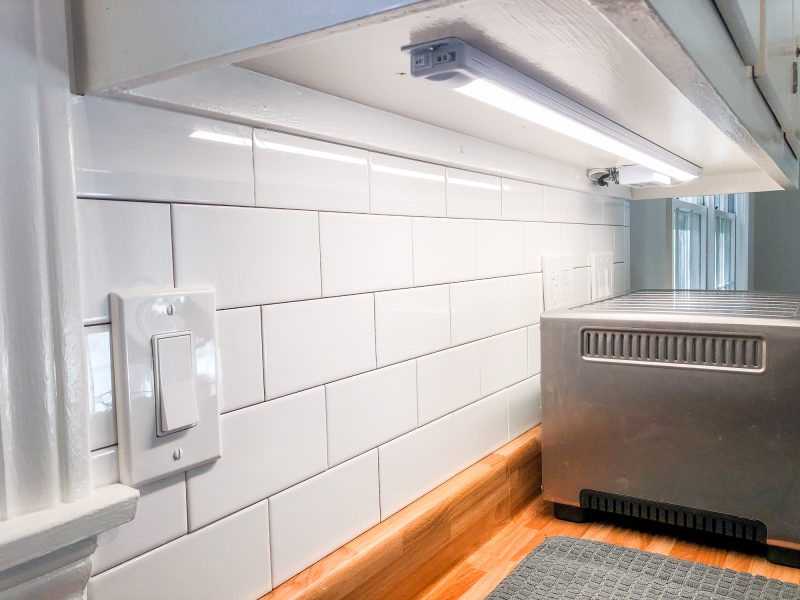
We thought a backsplash would help the look of things in our kitchen, so Bill decided to do the same temporary backsplash that he did at our office. This included white subway tile (our favorite, and super affordable!), affixed with construction adhesive. We didn’t even grout it! Once that was finished, he wired in all of the new light switches and outlets. He also added LED under cabinet lights to take advantage of the previous hardwired fluorescent fixtures (which buzzed and drove us both crazy!) These were really easy to install!
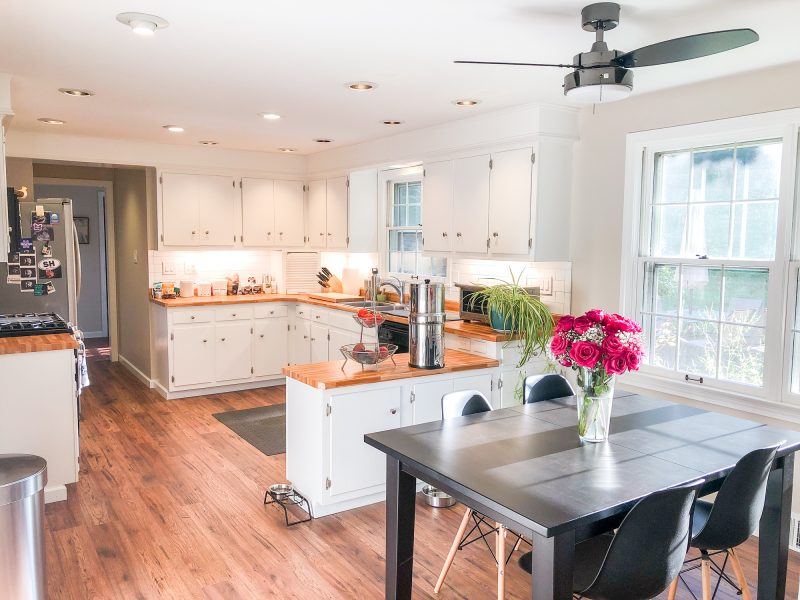
We are so happy with how this turned out. It was so affordable, and we got it done pretty quickly! Now we have a kitchen space that we love, just in time for baby to arrive.
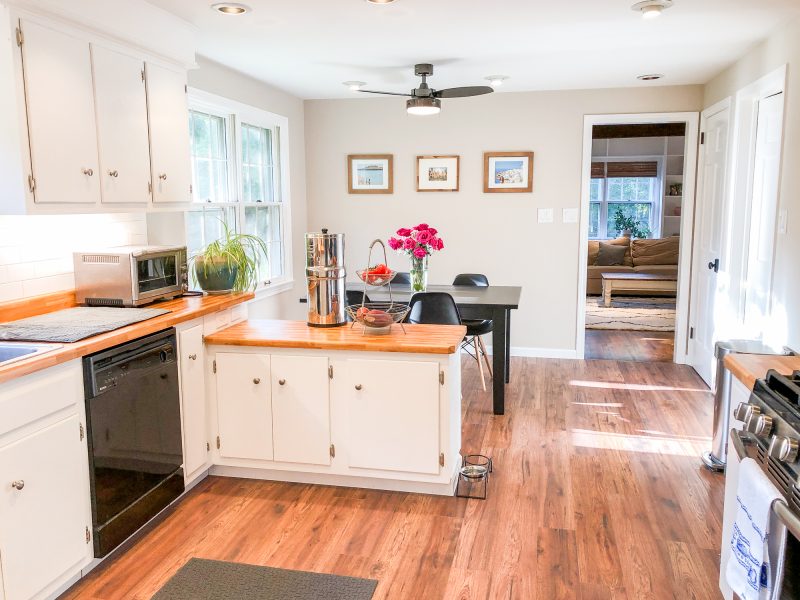
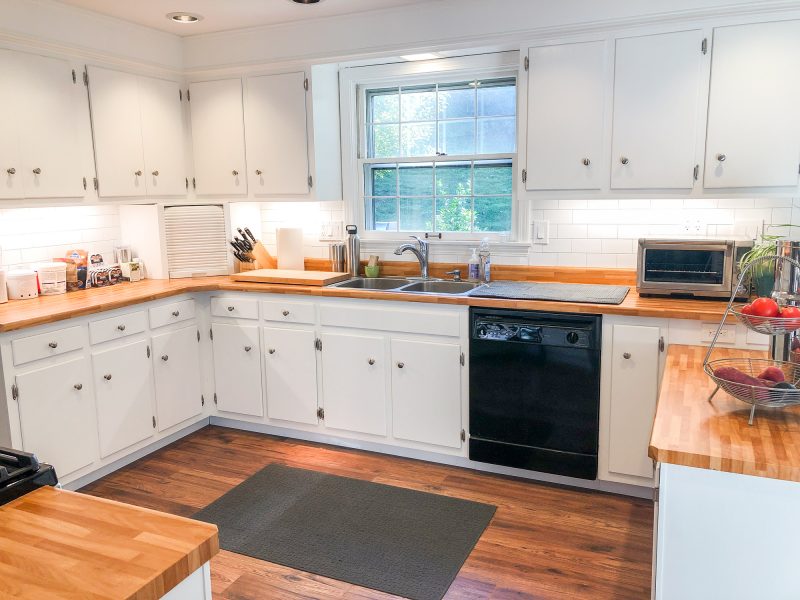
From this…
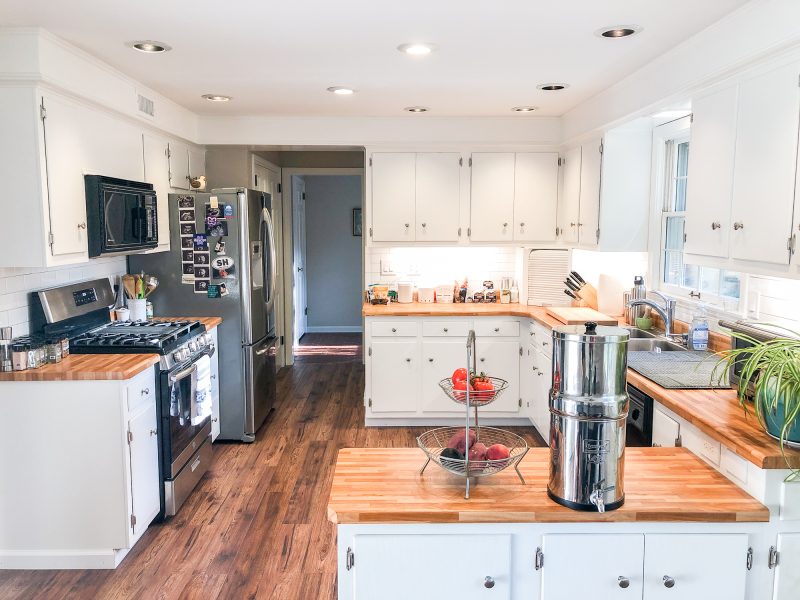
To this!
Renovation Build Sheet
(all prices are approximate)
- GE Gas Range (we got it a year ago, for $550 on sale)
- Paint and Labor – $1500
- Cabinet Hinges ~ $60
- Cabinet Pulls ~ $40
- Westinghouse 42″ Fan – $63
- Home Decorators Distressed Brown Hickory floor – $1.49/sf, $440 total (Home Depot)
- Foam vapor barrier for flooring – $50
- Base Trim – about $60 worth used from a contractor pack (Home Depot)
- Jeffrey Court 3×6″ bright white field tile – about $40 (Home Depot)
- Paintable caulk – $4
- PowerGrab Construction Adhesive – $12
- GE LED under cabinet Lights – $120 total for 3 lights
- Junction boxes to hardwire the LED lights – $27
- Various sockets and switches ~$100 (Home Depot)
- Door Hinges – $24
- Door Knobs (various types) – $60
- Butcher Block Contact Paper ~ $40


Love the butcher block contact paper for the countertops! We are hoping to do the same in one of our rental properties. Did you do anything special to prep the countertops or seal the contact paper to prevent it from peeling up when liquids are spilled on it?
Spilled liquids don’t seem to be a problem. I think standing water (like around a sink) might be a problem longer term. But then again, if you just buy some extra you’ll be ready to touch it up if you need. We’ve had it on since May and no issues yet!