I didn’t originally set out to make Crème Brûlée for Valentine’s Day. In fact, I didn’t set out to make crème brûlée at all, let alone a dairy free version. About a week ago, I set off for the grocery store after dinner one evening, with the intent to gather ingredients to make gluten-free chocolate croissants. I checked out a bunch of recipes, and holy cow they look hard to make. But it didn’t matter to me. I was hungry for chocolate croissants, and I wanted them now. Even if it meant eating them at midnight, which was an optimistic timeline if I’m being honest.
In the course of browsing the aisles for ingredients I needed, I came across a mix for crème brûlée. It was near the instant yeast I needed for the croissants. A light bulb went off in my head, knowing that crème brûlée only has like 4-5 ingredients. Forget this dumb mix, and forget the dumb croissants (for now). I was going to make crème brûlée instead. Don’t worry, I’ll address the chocolate croissants in the future. Bank on that one.
Hayley always jokes that I’m a sucker for food projects. It’s true, I really enjoy more complex food projects (which is hilarious, because as I’m writing this post right now, Hayley is sitting next to me carefulllllly piping grain-free sugar cookies with frosting for another Valentine’s Day treat for the blog. Look for that one up next!) My goal with this recipe was to distill the tedious steps into a more manageable recipe. Sure there’s a water bath and a torch involved, but it doesn’t get much more complex than that. At its core, you’re making a vanilla custard, baking and chilling it, then topping with some fine sugar and torching it into a crisp candy shell. It’s not that bad once you see it, so make sure you watch the video (above).
The first few times, I just made a single crème brûlée, and with heavy cream. But after a few shares on our Instagram stories, you guys let me know that a dairy-free version would be a lot more helpful to see. If you don’t have a problem with dairy, just use 200 grams of heavy cream for this recipe instead of the coconut cream. So I consulted with Hayley and she told me what to do to make it dairy-free. Turns out, one simple ingredient swap was all that was needed.
Another swap in this recipe, if you’d like to class-it-up a little bit, is to swap the teaspoon of vanilla for actual vanilla beans from half a pod of vanilla (about 3-4″ of a pod). Slit it open with a sharp knife and scrape out the teeny tiny vanilla beans. Then whisk them into the warm coconut cream. It’s a nice touch, but not necessary. Though you might want to swing for the fences if you’re making this for Valentine’s Day… up to you!

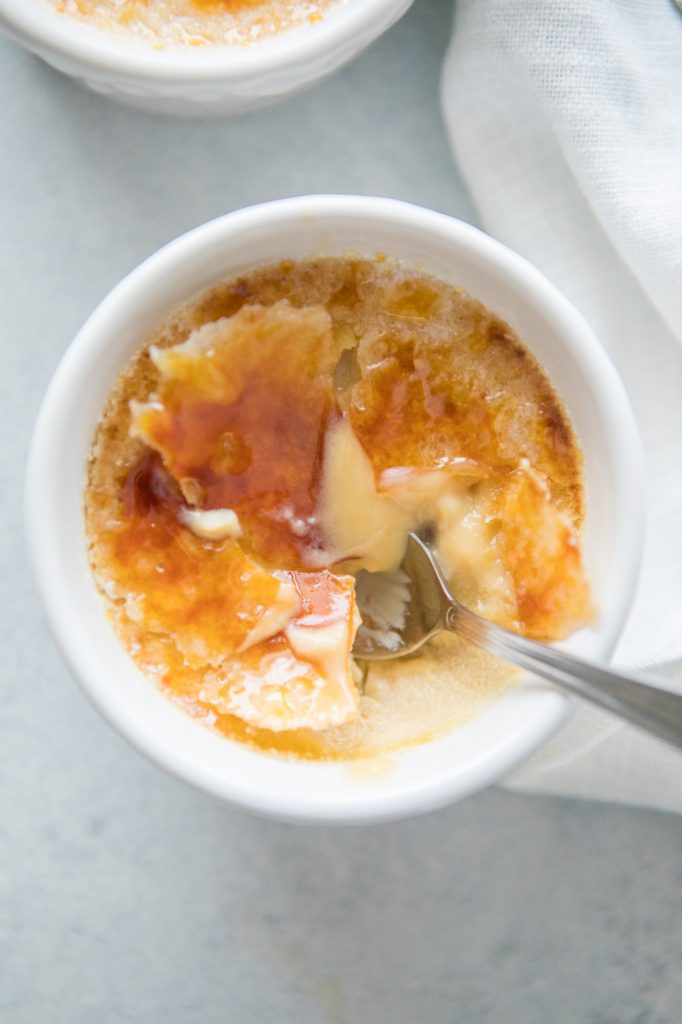
So you make the custard, put it into little 4 oz ramekins, and place them in a baking dish. You add some boiling water around them, and bake them gently at 300F for about 35 minutes. They are finished when they still jiggle slightly in the center. Remove them from the water bath and allow them to cool at least 10 minutes before transferring to your refrigerator. Let them chill at least 2 hours, ideally longer (like 4 hours, or overnight). Once they are cooled throughout, you can give them their signature sugar crust. I don’t advise doing this more than a few hours in advance. And in fact, it’s best to do this right before serving because 1) it looks really cool, and 2) it will heat up the custard below the surface and make it gooey and luscious. Perfect when serving.
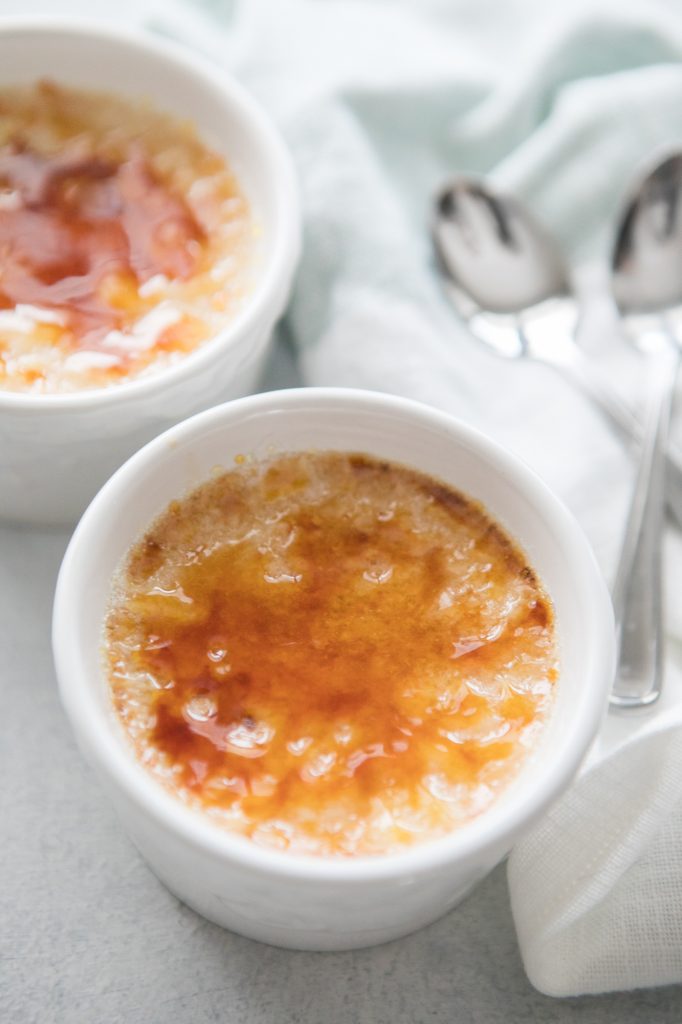
The process of adding the sugar and torching it is probably the most tedious part of the whole recipe. Make sure you get sugar all the way up to the edges of the custard. If you don’t, you’ll end up with charred custard instead of glossy candy sugar. Its not the best. For the candy shell, I used your basic run of the mill Domino granular white sugar for this. I found it to work nicely. You want a very fine sugar that toasts quickly and evenly. If you happen to accidentally burn the sugar during this process, try tilting the ramekin to spread the toasted color, and move on to another area. You can always return and heat it slightly to move it around later. Avoid working on area too long.
No Torch? You can use the broiler in your oven, though I’ve heard it yields a less even result. I’ve also read you can use a strong stick lighter, but that method sounds like it takes much longer.
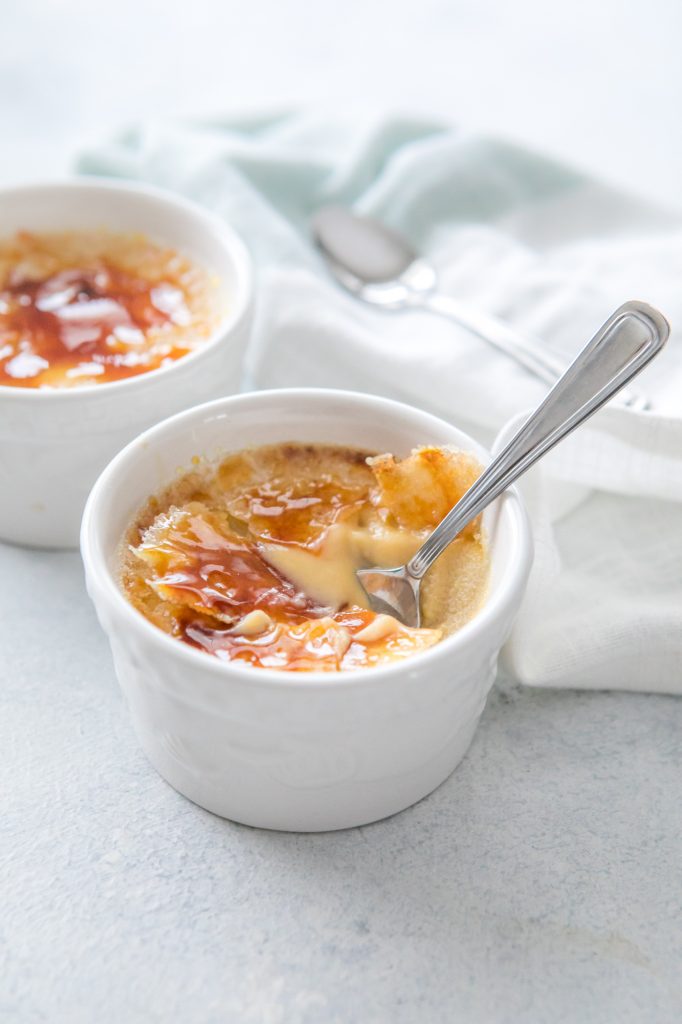
After you’ve toasted the sugar candy shell, let it rest for a few minutes so it can harden. Then you’re ready to dig in!!
I hope you guys love this recipe as much as I do. I’ve been obsessed with it all week, and am excited for you all to try it for Valentine’s Day, and beyond!
Enjoy,
Bill
Dairy-free Crème Brûlée

Serves: 2
Serves: 2Ingredients
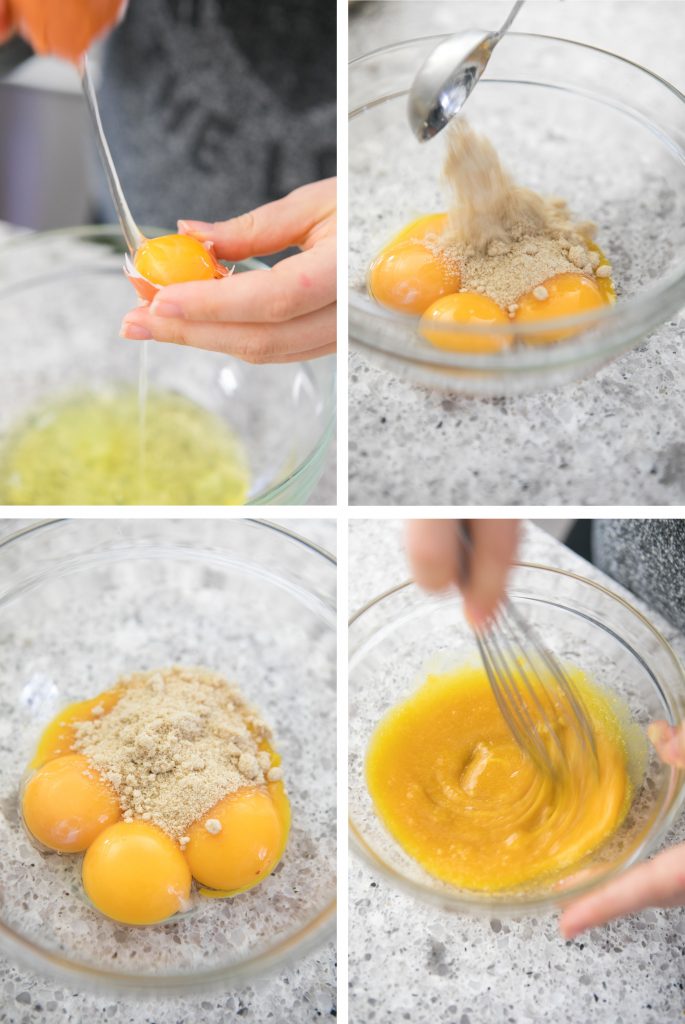
- 4 4 4 Egg Yolk
- 2 Tbsp 2 Tbsp 2 Tbsp Maple Sugar, (ideally, sifted or crushed fine)

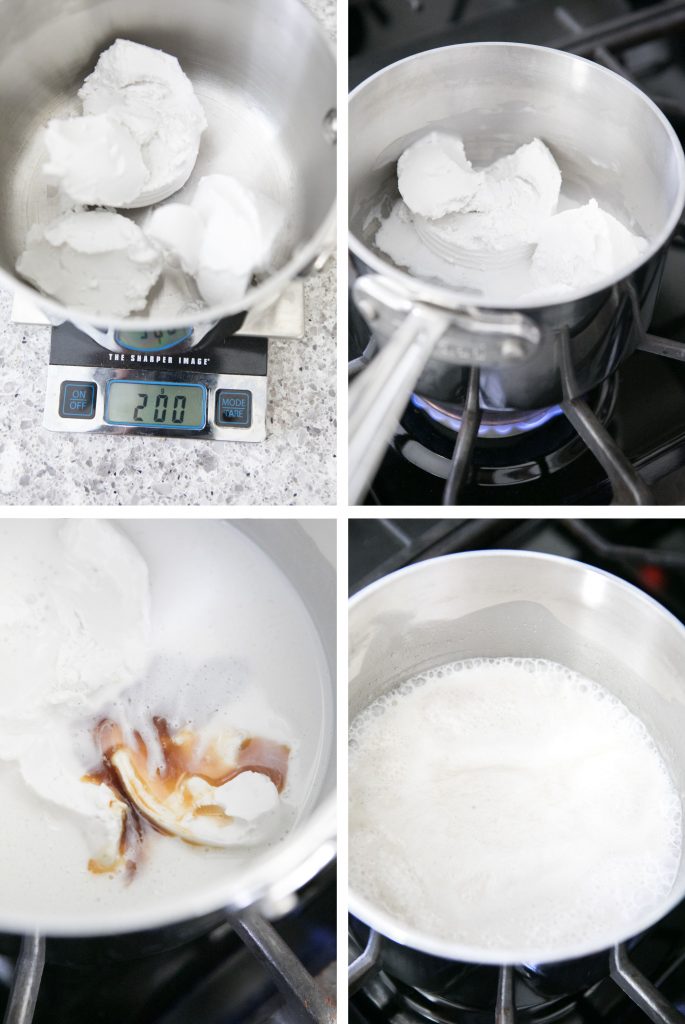
- 200 gram 200 gram 200 gram Coconut Cream
- 1 tsp 1 tsp 1 tsp Pure Vanilla Extract, or freshly scraped vanilla bean
- 1 tsp 1 tsp 1 tsp Raw Sugar, for the topping, must be fine granular
Process
- Preheat oven to 300F, and boil a kettle of water.
- Separate 4 eggs, placing the yolks in a medium mixing bowl. The whites are not needed for this recipe.
- Whisk in 2 Tbsp of maple sugar or other fine sugar. Set aside.
- Measure 200g of coconut cream, and place in a medium sauce pan. Heat over medium heat, and stir in 1 tsp of vanilla extract. If you have vanilla pods, scrape the vanilla beans from 1/2 of a vanilla pod. Stir to combine.
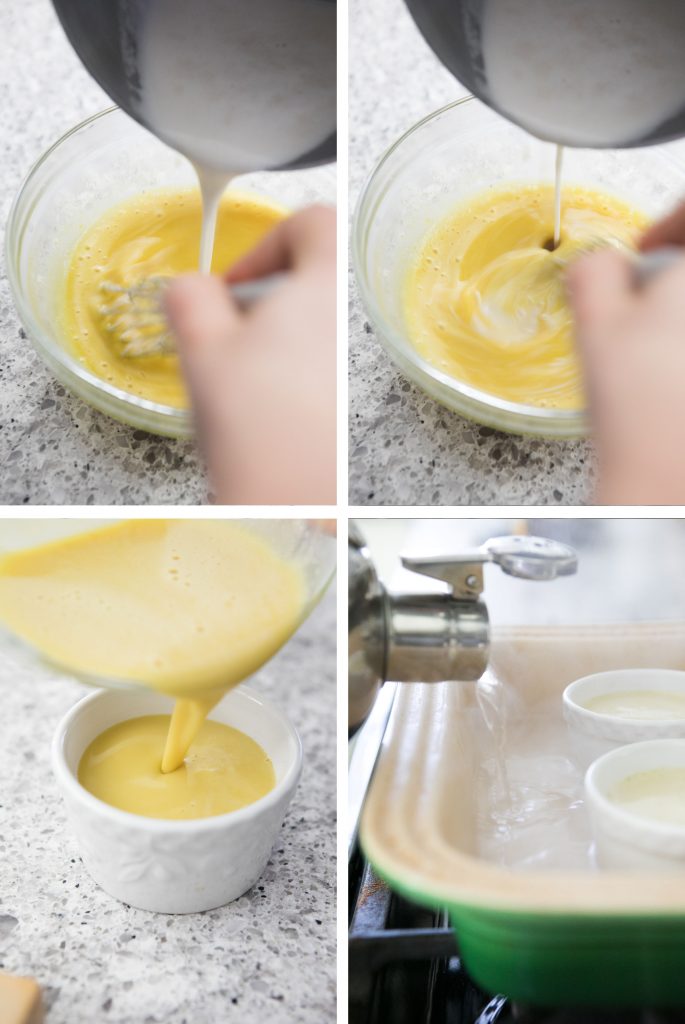
- When the coconut cream comes to a soft boil, remove from heat, and incorporate into the eggs, little by little while whisking the eggs (this is called tempering, and if you don't do this properly, you'll end up with sweet, scrambled eggs).
- Pour the egg yolk cream mixture into two 4-oz ramekins. Place the filled ramekins into a baking dish, and then add boiling water around them, filling about half way up the ramekins.
- Carefully transfer to a hot oven, and bake for 35-40 minutes. When they are done, the centers should still jiggle slightly.
- Remove from heat, and allow the ramekins to cool 10 minutes before refrigerating at least 2 hours, ideally overnight.
- Sprinkle any fine granulated sugar over the tops of the ramekins. Ensure your coverage is even, then torch with a kitchen torch. If you don't have a torch, you can also use your oven broiler, or a powerful stick lighter. Torch the sugar gently so that it does not burn. If a portion does burn, swirl the ramekin to distribute the darker colored sugar.
- Allow to cool for a few minutes before serving. Enjoy!


There are no comments yet.