Hi guys,
If you’ve followed us long enough, you might note that this is the third iteration of raised beds. At our first house, almost 10 years ago we made one giant raised bed which worked just fine but wasn’t super practical when it came to actually working on the garden. Because of the large size, you had to physically get into the garden to do anything but water it. (READ MORE about our V1 Garden)
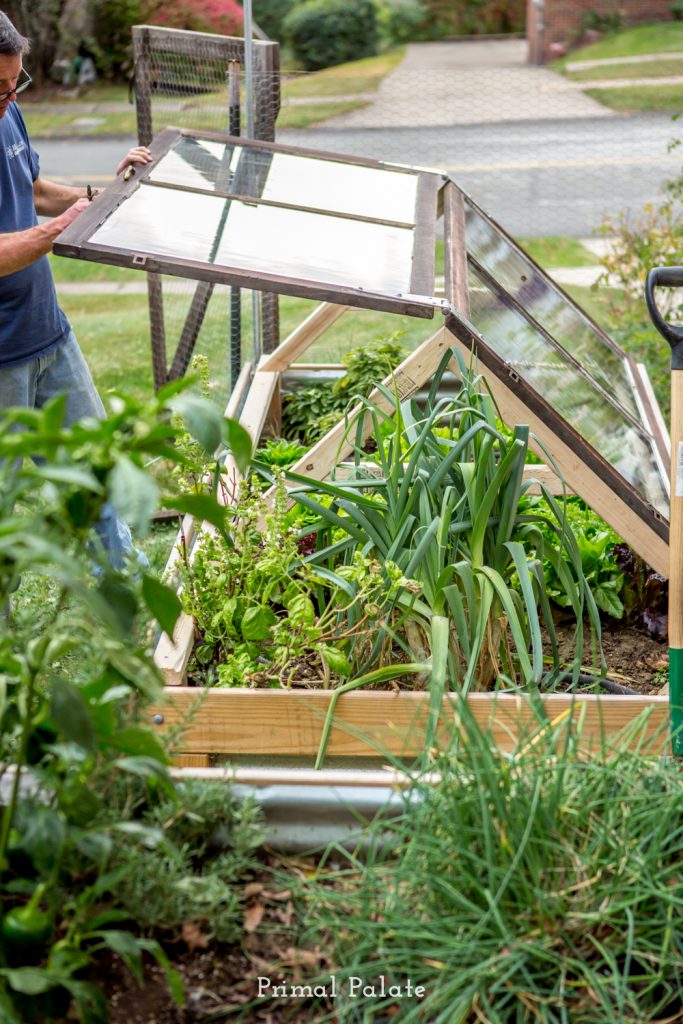
At our previous house, my dad helped us make beautiful raised beds with a combination of wood and corrugated steel paneling. These V2 beds were vastly improved in that they were appropriately sized. Each bed was 4 feet wide and 8 feet long, which allows you to reach into the full depth of the garden from the sides. Provided you have access on all sides, it works great. We learned how to extend the growing season by adding cold frames to these beds. Sometimes I miss them, because they were beautiful and grew awesome plants. (READ MORE about our V2 Gardens)
Find our Latest Recipes on
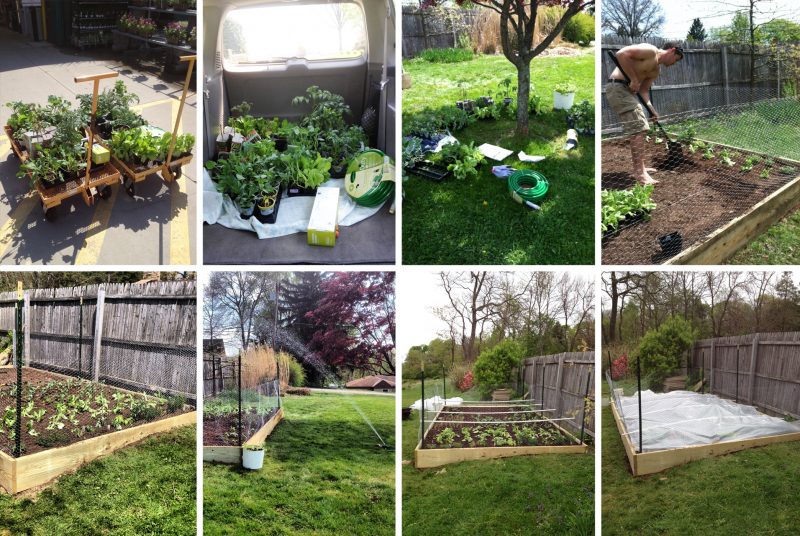
When we moved into our new home, we had a huge array of projects that required our attention inside. So in our first year in the house, we did a lot of indoor renovations and also cleaned up the gardens around the house itself. We’ve now been in the house for a year and a half, and it finally felt like time to start our vegetable garden. Truth be told, the current pandemic also played a big role in getting us off our butts to start this project. With a little extra time on our hands and an added incentive to have a degree of control over our food supply, we started planning.
Switch to safer with Beautycounter
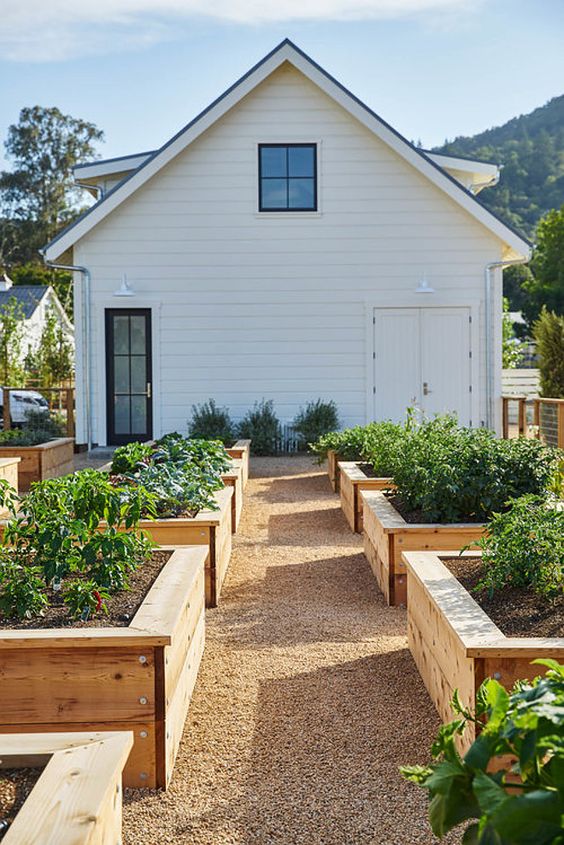
It wasn’t until we found this photo on Pinterest that our design aesthetic came into focus.
From there, we went out into the yard and discussed site selection. There were a couple spots we identified as possibilities, but ultimately a sunny spot in our lower yard won. It’s a gently sloping grassy area, getting about 5-7 hours of sun per day, that can easily accommodate expanding plans should the need arise. More sun would be better, but we live in a heavily wooded area, and this was one of the best spots in our yard.
We decided to create four beds in a symmetrical layout, each being 4′ x 6′ – which I knew from past experience was a good size. 4′ x 8′ would have been fine too, but that increase of 2 feet meant more money on wood, more soil, more digging, and more work. So I opted for the smaller layout, knowing we could add more beds someday if needed.
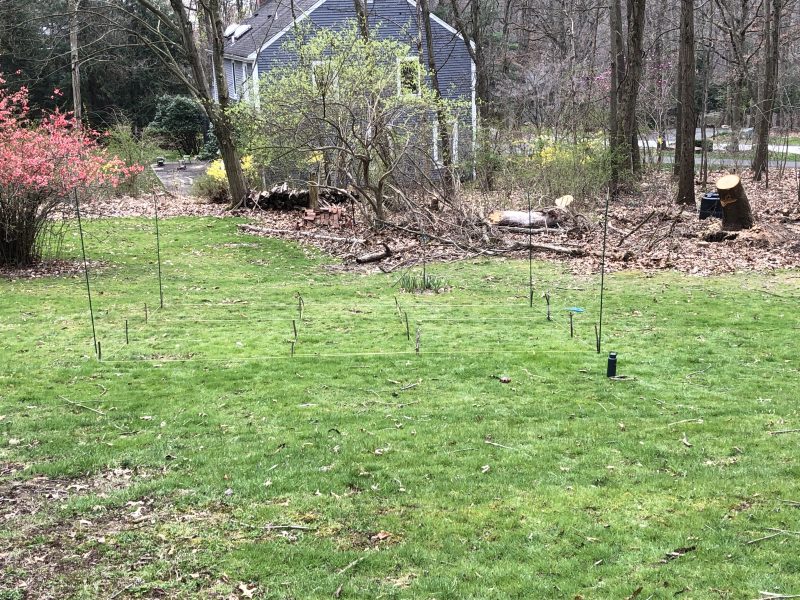
Site and layout had been decided, so the next day I went out to the spot and started laying out the garden using a string line. I found this helpful, as I wanted to align the beds in a specific orientation to our house and the street (basically aligned to the same grid). With string lines set up, I could not only step back and look to see if it looked right, but I was also able to take measurements from our driveway, which let me determine if the beds were parallel or not. If this sounds overboard, it gets better.
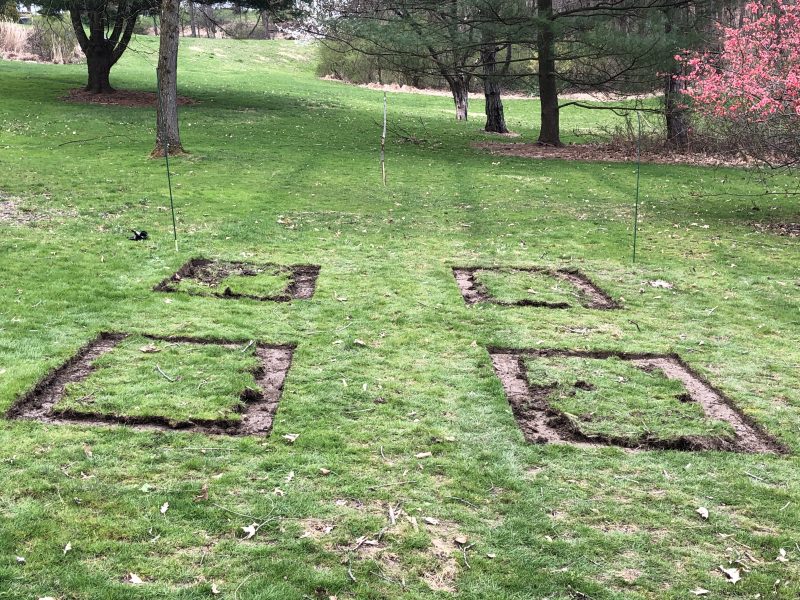
I used a square garden spade, my layout weapon of choice, to carefully cut out the bed outlines and remove the grass for about a shovel width. This allows for a second check of measurements and alignment. You know the saying measure twice, cut once? It’s okay if you measure a lot more than twice.
With the concept photo and dimensions in hand, I put together a lumber order from a nearby big box hardware store. I’m grateful that these guys were still taking and delivering orders: which seemed to be the best way to do it under the current shelter in place order. While I didn’t get to hand pick the lumber (resulting in some creative layout choices), I’m so glad I was able to place the order online and have it delivered a few days later.
I’m going to show our exact supply list and design drawings, etc… but first a caveat. If you want to make raised beds similar to these, you can pick a flat site and get away with doing them one board high instead of 2. I did 2 boards high to accommodate the cross slope. If your yard is flat, I suggest framing out a 4×6 bed with 2×10 or 2×12 and calling it a day. You’ll be much happier and spend a lot less time digging. However, if your site has a slope and want to make these exactly like ours, here’s the list of supplies you’ll want.
*With lumber selection, I ordered an extra board for each size so that I had the ability to select if one turned out to be really bad, which was a good thing. Even though some of the boards were real duds, I was able to allocate those to parts of construction that were at or below grade.
*All lumber used is untreated pine.

Raw Materials
- (13 boards) 2-in x 12-in x 12-ft Pine Lumber (Common); 1.5-in x 11.25-in x 12-ft (Actual)
- (10 pieces) 2-in x 4-in x 8-ft Spruce Pine Fir (Common); 1.5-in x 3.5-in x 8-ft (Actual)
- (11 boards) 2-in x 8-in x 12-ft Southern Yellow Pine Lumber (Common); 1.5-in x 7.25-in x 12-ft (Actual)
- 300 ct bucket of countersinking wood screws.
- Plus I ordered deer fencing at that time, as well as fresh saw blades which didn’t actually come in time.
- 6 yards of premium topsoil / compost mix.
- We also used some fine crushed limestone gravel from our driveway under the boards for better drainage. Optional.
Total materials cost was about $225 per raised bed, delivered. I’m certain that with some creativity you can do it for less.
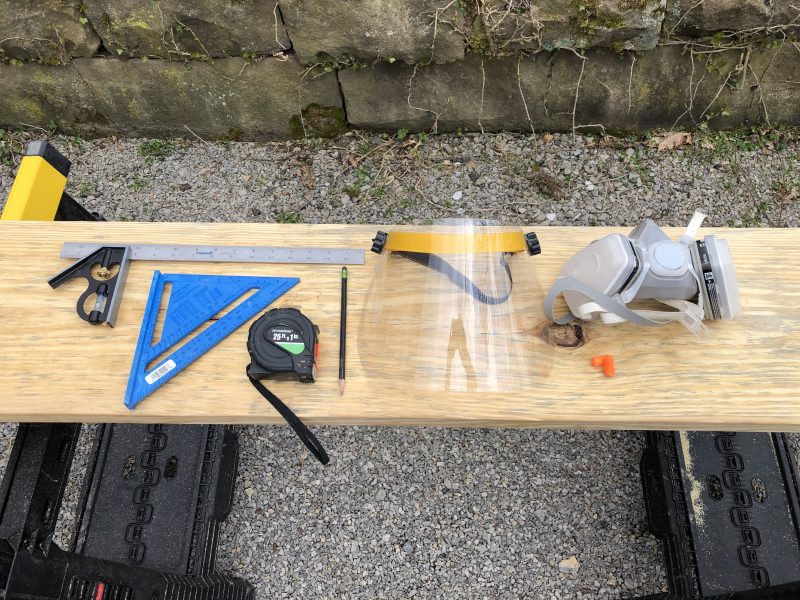
Tools & Supplies
- Wheelbarrow
- Square spade
- Round point shovel
- String line and string level
- Tape measure
- 2′ level (or longer)
- Mallet / hammer
- Combination square or carpenter’s square
- Speed Square with 45 degree angle
- Circular Saw
- Sawhorses
- Pencil
- Earplugs
- Mask
- Eye protection
- Gloves
- Axe (if digging in an area with roots)
- Rake
- Cordless drill
Seems like a long list, but luckily these are fairly common tools in a well equipped DIY arsenal. The trickiest part of this project is running a circular saw on the 45 degree cuts for the seat rail. Overall, its pretty standard construction. I chose to make the beds dimensionally 1″ shorter than 4×6 because I knew with the irregularities of digging the footings, allowing for inaccurate digging would make the beds easier to place.
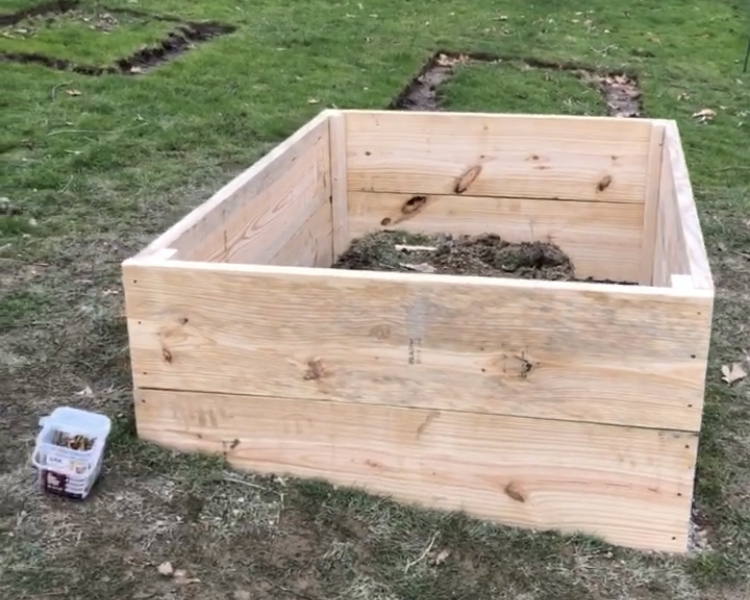
(Sorry for the bad photo – its a capture from a video). This photo shows some of the box construction, before adding the soil and the cap).
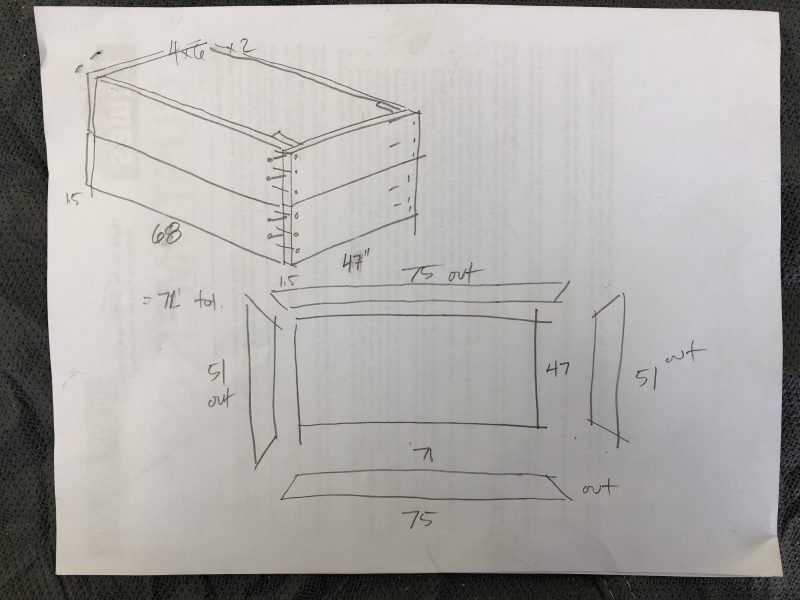
This is my rough construction drawing with key dimensions in inches. The beds are 2 boards high of 2 x 12, with the short side facing forward and having a full board width for the short side. The long dimension fits between the end caps. 2×4’s help attach the top and bottom courses at the corners. The bottom drawing shows the cap / seat rail. We decided on a 2″ overhang for the seat rail (made with 2×8’s), which gave us the outside dimensions of the miter cut boards. Along with the speed square, this gave a quick way to lay out and cut the seat rail boards.
Construction Process:
- Dig out footing to approximate level.
- Check for level (if level, proceed).
- Thin layer of gravel in footing for better drainage.
- Cut 2×12 boards for bottom course (2 @ 47″, 2 @ 68″).
- Assemble bottom layer.
- Check for level on bottom later, Check corners and cross measurements for square.
- Cut upper course boards, Cut 2×4’s to 22.5″ for framing the corners.
- Attach the long boards to the 2×4’s at the corners, top course first, then bottom.
- Attach end boards (47″ boards) to frame.
- Fill bed with soil.
- Cut and attach seat rail boards.
Rinse and repeat for additional beds.
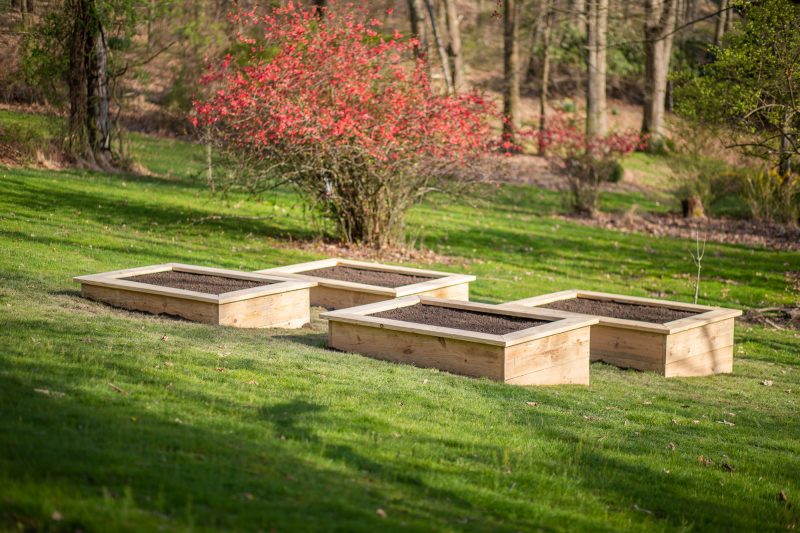
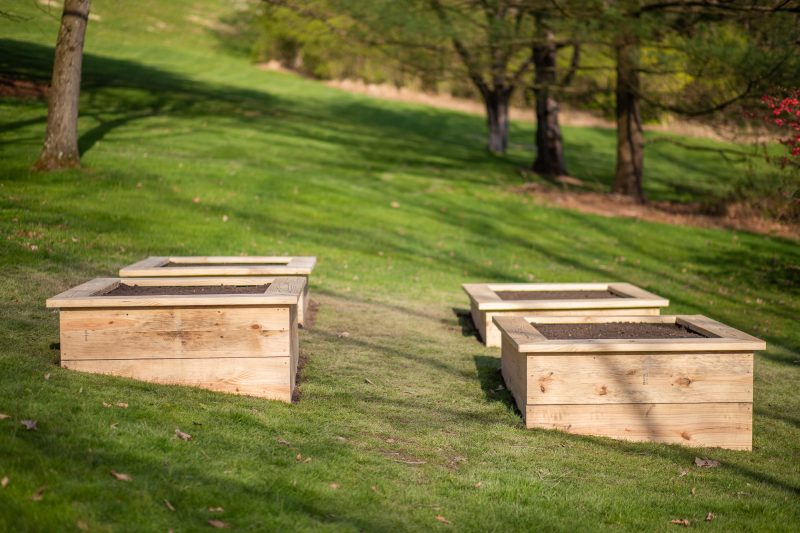
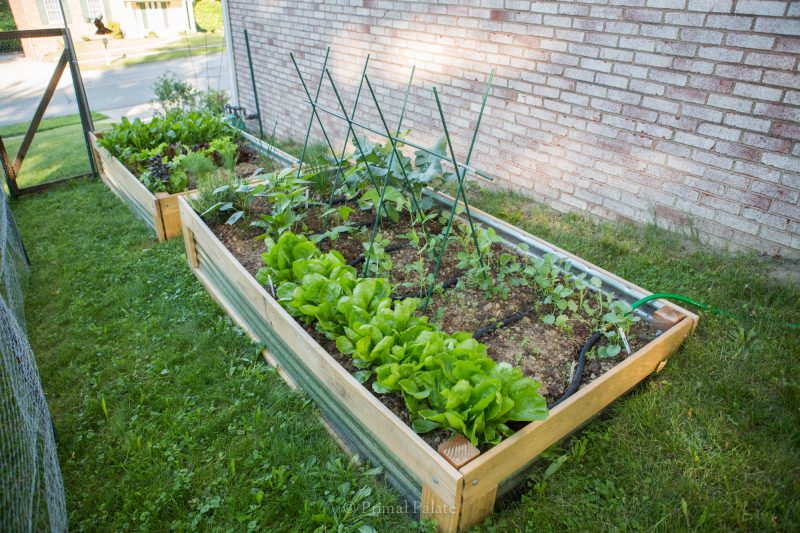
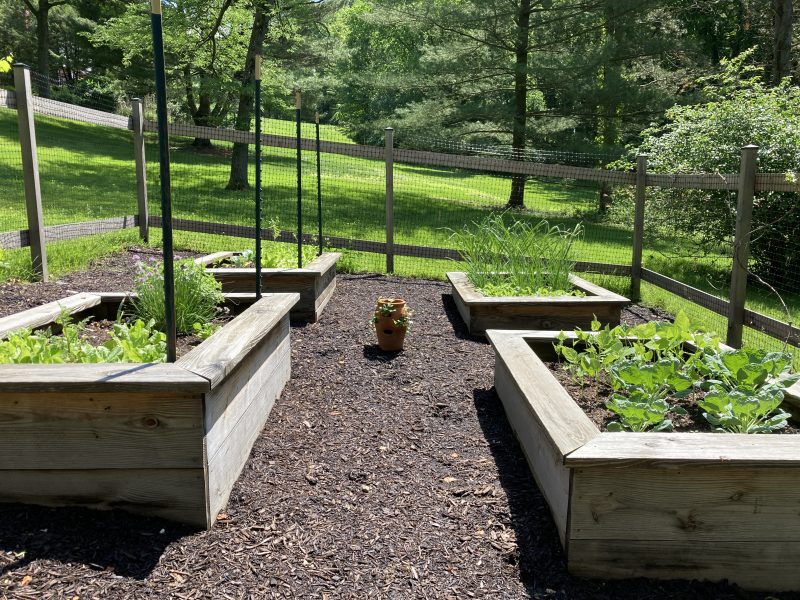
I’m so pleased with how the beds turned out. Naturally the real fun begins when we get to plant them and eat the fruits of our labor. But the design and construction is the fundamental work of building something that will last and be enjoyed for years to come. Every time I look out the window at the beds, I wanted to be proud of the work that I did. The last two vegetable gardens we had were not in a sight line from the house, so building these well was particularly important to me.
I’ll update this post with photos of them planted when we are rolling with produce later this spring. If you have any questions about the build you can reach out on social media, or comment below – but I am happy to help answer your gardening and raised bed building questions. Hope this post was helpful! Good luck!
Bill
2-year update
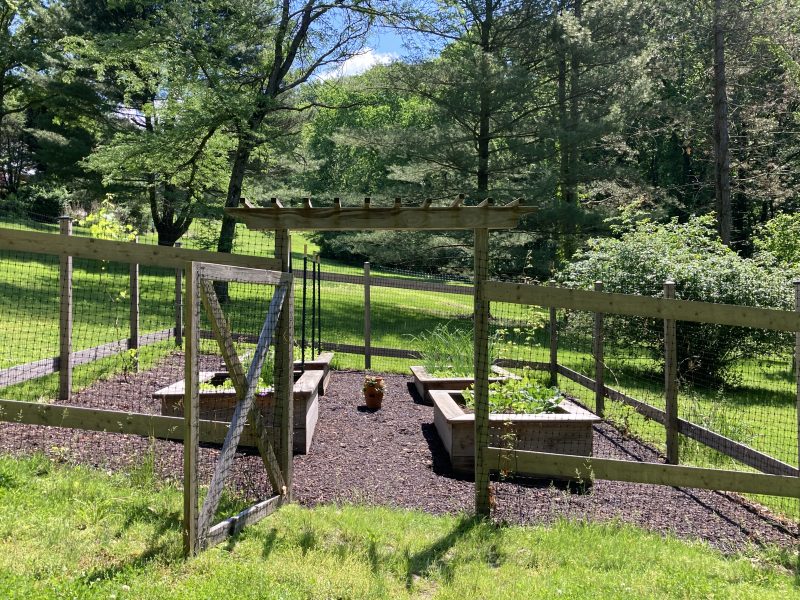
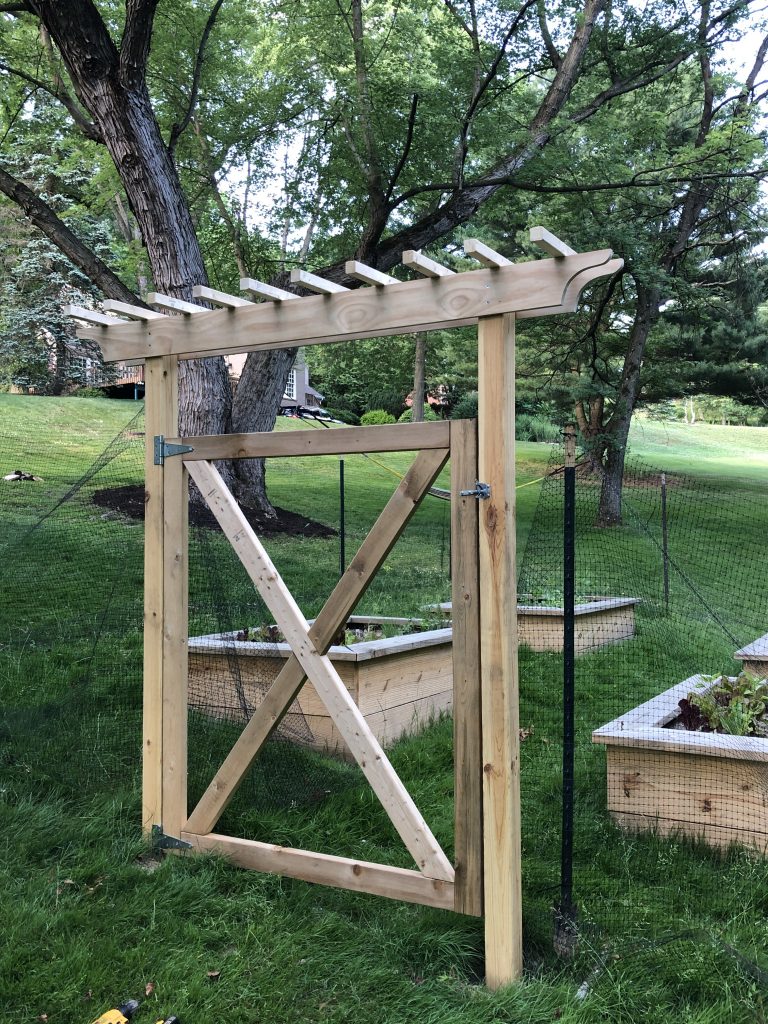
Obviously, you can see a lot of changes and additions since the original beds were built. The first major change was building the garden gate and arbor. Knowing that this is a working garden, every dimension has been considered to accommodate a wheelbarrow, and I’m pleased to say that after 2 years of living with this garden, we succeeded there. The garden gate is plenty wide for it, as well as the spacing between the beds too.
After building the gate in the summer of 2020, we added a simple deer fence with some steel posts just hand-hammered into the ground, and some basic light-duty deer fencing. It was enough to keep the deer out.
For the 2021 season, I decided to make a permanent fence solution for the garden. Again, keeping spacings in mind, the garden fence was set 4′ off of the raised beds. 4×4 posts were sunk into pits with concrete, and then the tops were lopped off to have a consistent height relative to the ground. We topped the posts with iron caps to help drainage and discourage rot. 1×6 select pine fence boards help to stabilize a more robust deer fence around the perimeter. We also removed all of the grass inside the fence. Good sections of the sod were successfully transplanted to other parts of the yard that needed it.
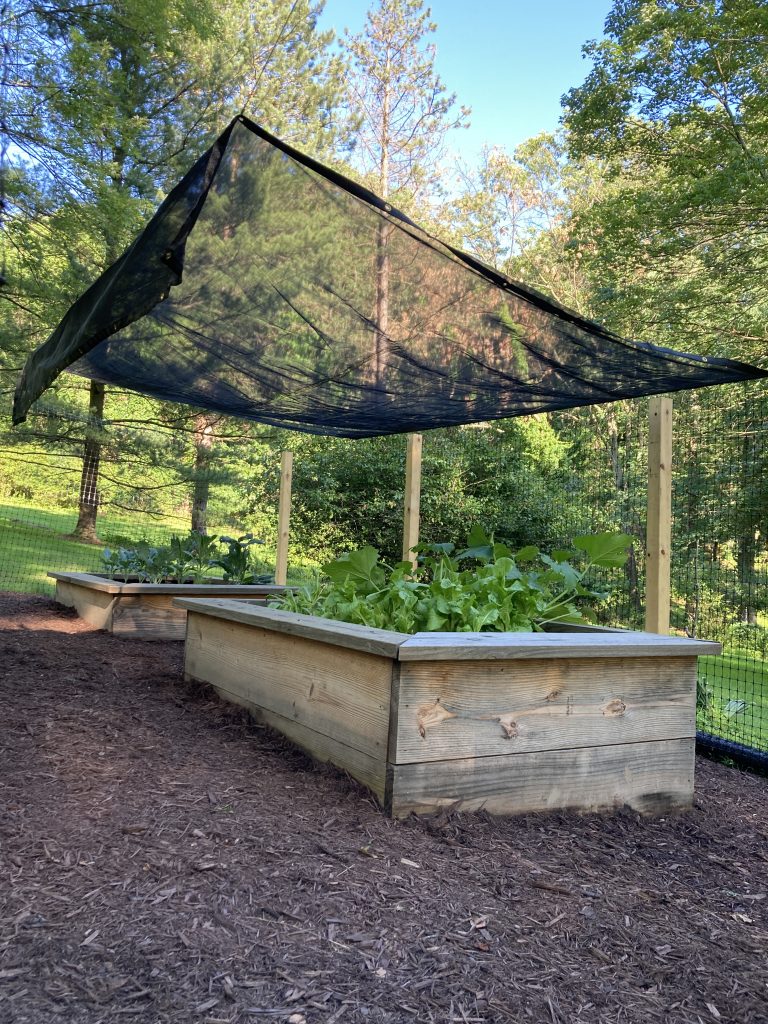
In addition to the fence, we added a 50% shade canopy over a portion of the garden growing cooler weather crops (like lettuce) to help extend their growing season into the hotter summer months. Having sturdy fence posts allowed us to have the canopy high enough to walk under it.
The 2022 growing season is well underway here, and we amended the soil in the garden beds two years in a row with a blend of mushroom manure, cow manure, compost, and peat moss. The original soil we filled the beds with was not draining water well, and the plants were not thriving. Adding an abundance of organic matter has really done wonders for the health of our crops.
We also relocated two grape vines to the inside perimeter fence: a white seedless variety, and a concord variety. In the center of the garden is a strawberry planter. While they don’t have any sort of visual impact yet, we have a watermelon and several zucchini planted directed in the ground around the raised beds as well. All along, the vision has been to intersperse plants around the raised beds.
So that’s the short version. Overall we’re VERY happy with how the vegetable garden is coming along. I love the weathered patina of the untreated wood as it gracefully ages in the elements. I often find myself wanting to just sit in the garden and enjoy some peace and quiet. Our daughter Isla has also taken quite a liking to running around and inspecting the plants. It’s been a great family project that we enjoy year after year.
Hopefully you found this update helpful and informative. If you ever have any questions about starting your own garden, feel free to reach out!
-Bill & Hayley


You did such a great job on this! I save the same Pinterest photo to my board for raised beds! You inspired me to try to take on this project in my slope yard! I wish I could have seen more photos of you digging and know how much to dig out….that part makes me nervous because I’m on a slope. Again great job! I’m inspired!