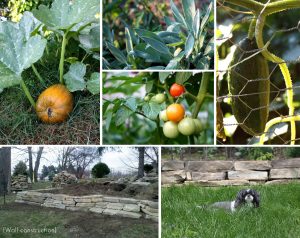
 Last fall, Bill and I moved into a house with an enormous yard. We have just started to enjoy the property we live on now that the sun is shining in Pittsburgh again (most days at least…). April 16th was our two year anniversary, and in typical Bill and Hayley fashion, at the very last minute, we decided to spend the afternoon of our anniversary starting a garden project. We always find ourself drooling over Bill’s mom’s gorgeous vegetable garden (at right), and were lucky enough to enjoy her fresh herbs and veggies most of last year, but now that we are in our own house we really wanted to start a garden of our own.
Growing up with a few garden experts in my family, I have always dreamed of growing vegetables of my own. My dad’s mom, my Grandma Jo is a master gardener, and I can remember being so excited to pick raspberries in my grandparents back yard garden. My dad has followed in his mom’s foot steps by starting a garden of his own where he mainly grows pickling cucumbers and herbs for making pickles (see Todd’s Pickles for the family recipe). Bill’s mom is another garden angel. Her yard is like a magical land of flowers and vegetables, and I am always amazed at the beauty she can create.
Thankfully, with Bill being a registered landscape architect, and the guidance of many family members, we felt confident to dive in to a garden project with the hopes that we would build an amazing vegetable garden and enjoy home grown produce all summer long. Before I turn the keys over to Bill, so that he can really explain how to build your own garden at home, I will say this…building a vegetable garden is hard work! I don’t think either of us realized how intense this project was going to be (correction: Hayley didn’t realize how intense it would be! The only thing that caught me off guard was the utterly awful soil quality in our yard) I have much more appreciation and respect for farmers, not so say I didn’t before, but now I really get it, and our little garden is nothing compared to running and working on a farm full time. We did not need any CrossFit workouts the days we were working on our garden. Although it was hard work, it was so much fun. We both really enjoyed working in the yard together, and our work is no where near being done!
And now, I hand you over to the resident landscape architect with home gardening 101:
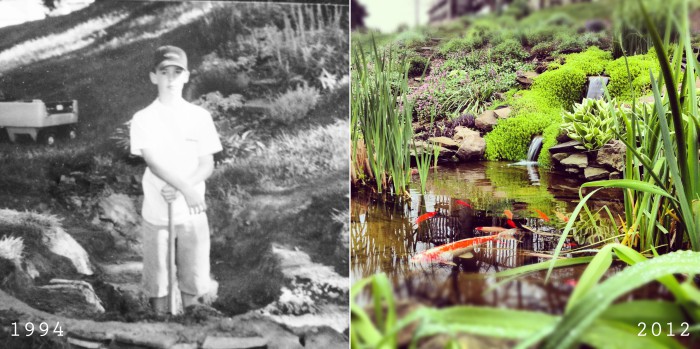
Okay guys, well as Hayley said I’m a RLA (registered landscape architect), and have been gardening for 17 years alongside my mom. I’ll never forget when the bug bit: she took me to a nursery when I was 11 and let me choose a plant all for myself. It was a big green Hosta, and we planted it in a shady flower bed in our backyard. By the next spring, I was happily digging new flower beds, making stone steps up a hillside, and crafting a pond and waterfall (all at the age of 12). My parents still have the pond I made all those years ago. Take a good look at 12 year old Bill… I still don’t know how I convinced my parents to let me undertake such a project!
In my high school years, I had a little backyard landscaping business and was able to buy my first car with the profit. During my junior year, I decided that I wanted to become a landscape architect and applied for early admission at Penn State, to which I was accepted. The program at Penn State was great (it was ranked the #1 LA program in the country when I graduated), so our class hit the ripe job market like first round draft picks. I ended up taking a nice job in Washington DC doing international projects. China, Nicaragua, Dubai, Ethiopia, India… the projects were creative and fun, but work eventually dried up when the global economy froze up, and along with 80% of the firm I lost my job and moved home. I took a job in Pittsburgh with a firm that primarily did public sector work. It was the opposite of glamorous (to be perfectly blunt), but it was a safe job and it was a paycheck. Anyway, the story gets really complicated shortly thereafter, but suffice it to say I had all sorts of interesting experiences as a Landscape Architect.
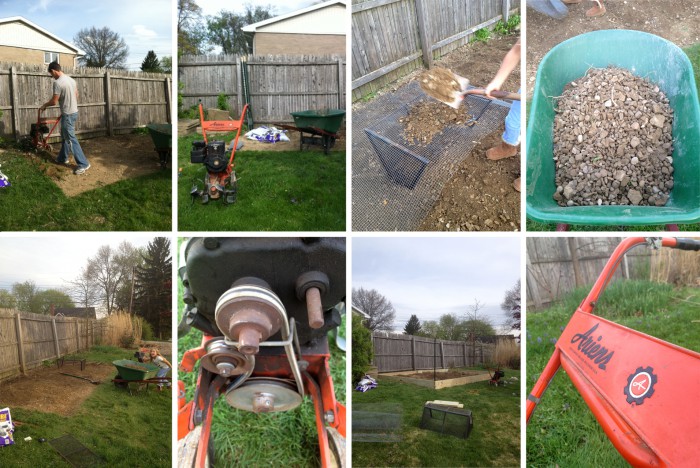
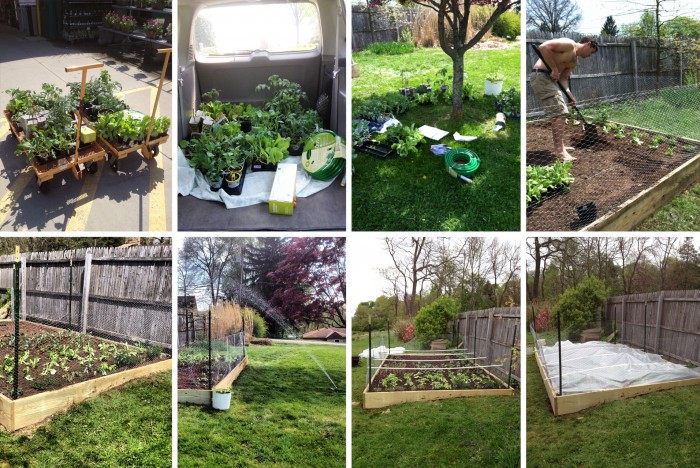
Hayley and I always knew we wanted a big garden when we got a place of our own, so when the 70 degree days hit early this spring, we jumped at the chance to tear up a little grass and get our garden going. The first decision came to site selection; the best spots for vegetable gardens get over 6 hours of direct sunlight per day (Ideally more than 8 hours). The soil should be well drained, and silty loam (light, fluffy, full of nutrients, no big rocks). We chose to start our vegetable garden at the highest point in our yard. It gets about 8 hours of sun, and is out of the way against a neighbor’s fence. The only drawback of the site is that the fence blocks early morning sun, which will dry the dew from plant leaves and lessen the chances of disease and fungus. We started cutting the outline for the garden by hand with a spade, but quickly found out that technique was not going to be feasible. We made a quick trip across town to my parent’s house and picked up my ancient Ariens rototiller. We fired it up, and went to work. To make a long (boring) story short, the soil turned out to be incredibly bad. Huge chunks of shale, lots of smaller stones, and virtually no organic matter – the soil was an absolute loss. In good conscience, I knew I couldn’t just leave the soil as it was, so I rigged up a little contraption that allowed us to sift out the largest rocks. Hayley’s cousin Brooke happened to be over for the afternoon when we were digging, so we leveraged a bit of child labor for the job of removing stone.
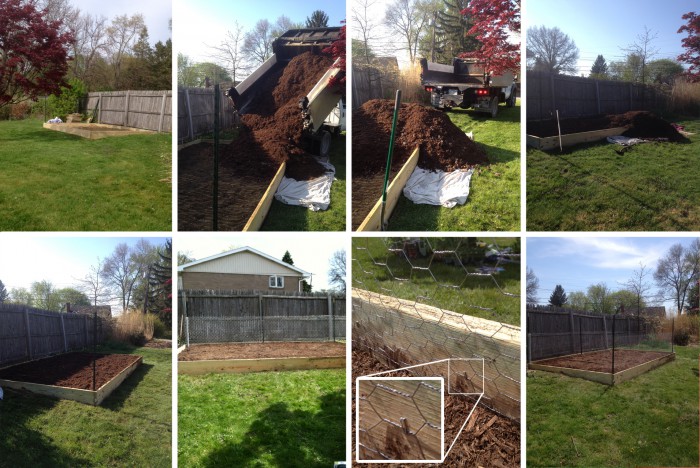
At that point, I knew we would have to do a raised bed and have some better soil brought in to amend the existing soil. We constructed a 16’x10′ raised bed using pressure-treated lumber in 2×12 pieces. Getting the lumber level around the bed was certainly a chore, but it is well worth it in terms of visual appeal and construction longevity. Since the soil was already rocky, we set it directly on the existing grade. Typically, you’ll do a wall on crushed aggregate, so it was like having a typical spec footing already in place. We used basic decking screws to attach the wood, and voila – a box was made.
The next morning, we had 4 yards of mushroom manure dumped for soil improvements. This is the “better” choice in the good-better-best spectrum (ie. topsoil – mushroom manure – triple mix of compost, soil and peat). The things you want to watch out for with mushroom manure is you will want to replenish the nutrients in the soil with ‘compost tea’ since the soil is typically pasteurized to kill off mushroom spores. The second is that it can sometimes be a little salty and cause burns on plants that are not at all salt tolerant. We’re hoping that our mushroom manure is the good stuff, and wont hurt the plants. If further remediation is needed… well, we will take care of it. For now, we have our fingers crossed.
After the soil was spread out evenly in the garden, we addressed the critter control issue. We have a very fiesty groundhog that lives under our deck (think Punxsutawny Phil, but more of an asshole), and I’m sure he would decimate our vegetable garden in a single sitting, so fencing was a necessity. We’re not so much worried about animals digging under the boarding, since it’s primarily rock. For fencing, we went with a simple and cheap chicken wire setup. The corners of the garden are set with 6′ metal stakes, and the chicken wire is set 3″ below the boards and stapled to it in 6″ increments the entire way around. Currently we have a 3′ fence, but we’ll add another 2′ level if it looks like deer pose a threat. I’ve seen the damage deer and groundhogs can do to gardens, and it isn’t pretty… it kind of makes you think “why even bother planting stuff?” So while the security precautions feel a bit exaggerated right now, I know that when we have perfect tomatoes, cukes, broccoli and squash this summer, I’ll feel better about our maximum security garden.
On to the plants! While we had the use of my parent’s van, we went to Home Depot and picked up a boatload of plants. Here is the rundown of our purchase.
Herbs: 2-rosemary, 2-cilantro, cinnamon basil, Greek basil, sweet basil, 2-lemon thyme, oregano, flat leaf parsley, and winter savory (a gift from Hayley’s grandy Kyp).
Vegetables: 75 red onions, 75 yellow onions, 36 bibb lettuce, 16 broccoli, 16 cauliflower, 2 butternut squash, 32 boston pickling cucumber, 5 varieties of tomatoes, 2 red bell peppers, 8 green bell peppers, 16 asparagus
Fruits: 6 strawberries, golden raspberries, black raspberries, red raspberries, green grapes, red grapes
I’m probably forgetting some plants, but it was a LOT to plant at once. A few days after we planted the garden, temperatures took a nose dive here. We got a few cold days, and even had a scare where we were expected to get a historic 8″ of snow. Fortunately, that didn’t pan out and it stayed warm enough for rain. We had to pull our tomato plants (and should have picked our lettuce and pulled our basil). Most of the garden seems to be doing fine, as we’ve covered it with plastic nearly every night for the last week. In most places, Mothers Day is the milestone for planting your garden. We were warned not to plant so early, but we didn’t listen…lesson learned! We will keep everyone updated over the warm months as things grow and find their way to our kitchen.
If you have any questions about gardening, feel free to post them below and I’ll answer to the best of my abilities.





I’m glad you identified where you live as “too early” for planting means different things depending on where one lives. For example, those of us in the Upper Midwest must wait for Memorial Weekend before we plant. Still, I hope your posts create a whole caveful of Paleo Gardeners! Rock on, H & B!
What a great post! My husband and I just recently started our own backyard garden and had to contend with icky soil and hungry dogs. I look forward to reading your upcoming posts, any tips you have to offer, and watching the progress of your garden. I especially can’t wait to see the gorgeous pictures and all the great food you guys will be making. Thank you so much for sharing!
I’ve been wanting to grow a garden for years! I have just a small patio on my apartment. Hopefully, I’ll be able to post pictures soon 🙂
Where did you plant the raspberries and grapes?
The raspberries and grapes actually have not been planted yet. I’ve been thinking of planting them in another flower bed around the house, but I don’t want the deer and groundhogs to have access. I have another day or two to figure it out, at which point I’ll probably have to bite the bullet and just plant them.
Hi Bill,
You mentioned how you stapled the chicken wire to the planks but what do you do get in and out of the box ? I am trying to put up a chicken wire fence like that to protect from whoever is eating my broccoli plants. Thanks for this garden post and good luck with it !
We have a seam at one of the corners, and use the bare edge to hook it to itself. It takes about 20 seconds to get it apart, but it works beautifully! Hayley’s dad is working on a gate for us, so we’ll update you guys when we install it!
Bill, I have ordered plants from a nursery and they have yet to come by mail. I have a small patio with my apartment and the landlord will not allow a raised bed for planting a garden. I am forced to try container/pots to plant things and wonder if you have any advice for me. This is all new to me, just want healthy food and to save money on food also, by growing it myself. Thanks.