
Hello friends,
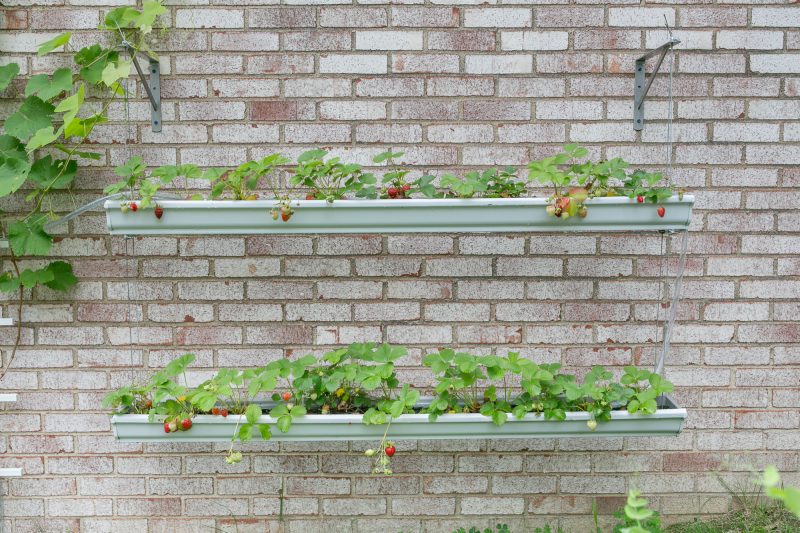
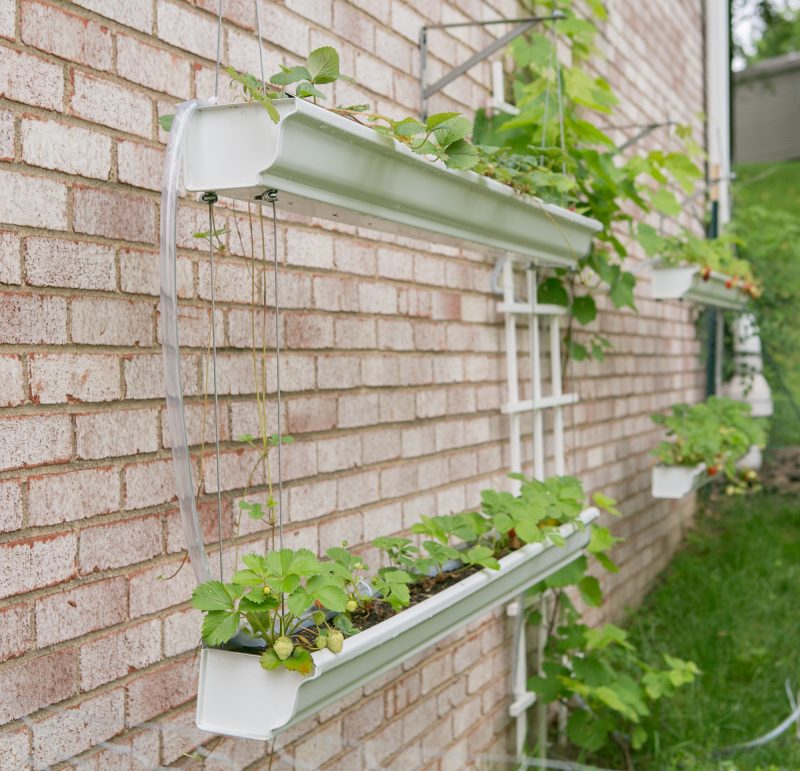
We’ve gotten a lot of requests to share a DIY for how to make Gutter Strawberry Planters. They are SO COOL and a great way to go if you love strawberries. This is our first year doing them this way, and we can already tell that this will be THE preferred method for growing them from now on. We have two hanging rigs like the one we’re going to show you how to make below. To make two like we did, just double the materials worksheet.
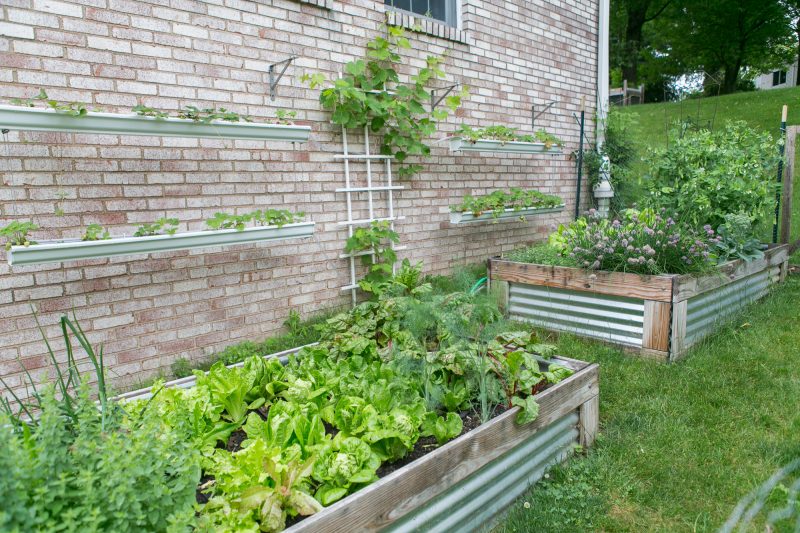
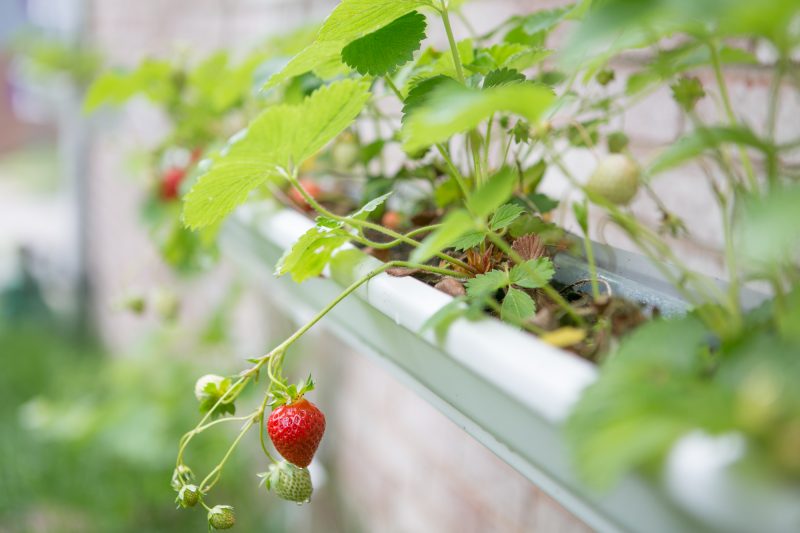
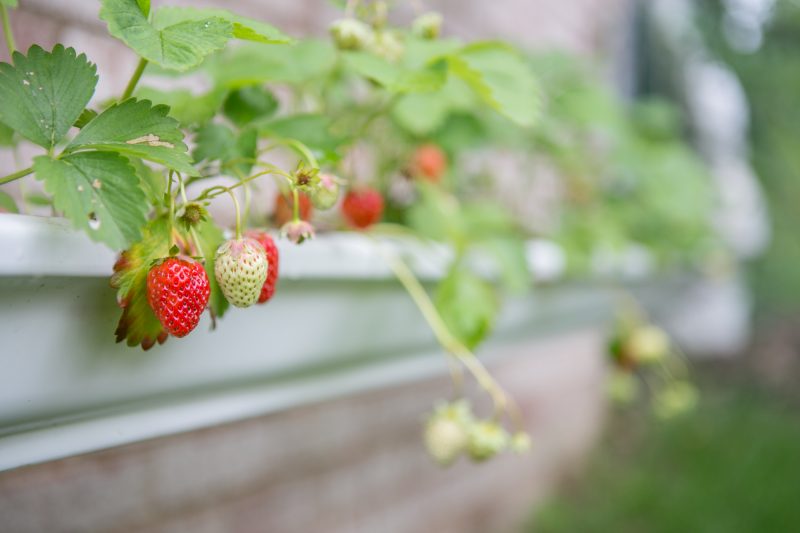
There are a few benefits of growing strawberries in gutters, so let’s start with those reasons:
- By planting and hanging in gutters, the berries are not as susceptible to ground-dwelling animals
- Plants are contained, rather than spreading (which they readily do!)
- Fruit hangs, so it doesn’t rot on the ground
Here are some special considerations:
- You need a place to hang them
- They can dry out quickly
- They need full sun and frequent water
The part about them drying out quickly is the primary concern for most people. Strawberries, like most fruiting plants, like to have a lot of sun, and a lot of water. If you have a lot of sun without the water they dry out and die. If you have a lot of water without the sun, they rot and die. So you need a lot of both. We like to see our strawberries get watered at least every other day in mild weather and every day in hot weather. We have ours irrigated, but I’ll cover that at the bottom of this post.

(^^ hover or click ‘pin it’ to save it for later in Pinterest! ^^)
Tools Needed:
- Tin Snips (bring to hardware store when getting the gutter) ** Unless you have a big truck, you’ll need to cut the 10′ gutter IN HALF to fit it into your car. You’ll do this in the hardware store parking lot.**
- Measuring Tape (bring to hardware store when getting the gutter)
- Pencil or marker (bring to hardware store when getting the gutter)
- Drill (with a drill bit to match the diameter of the hanging wire)
- Basic hand tools (like socket wrenches or pliers, to tighten the cable locks)
Materials Needed:
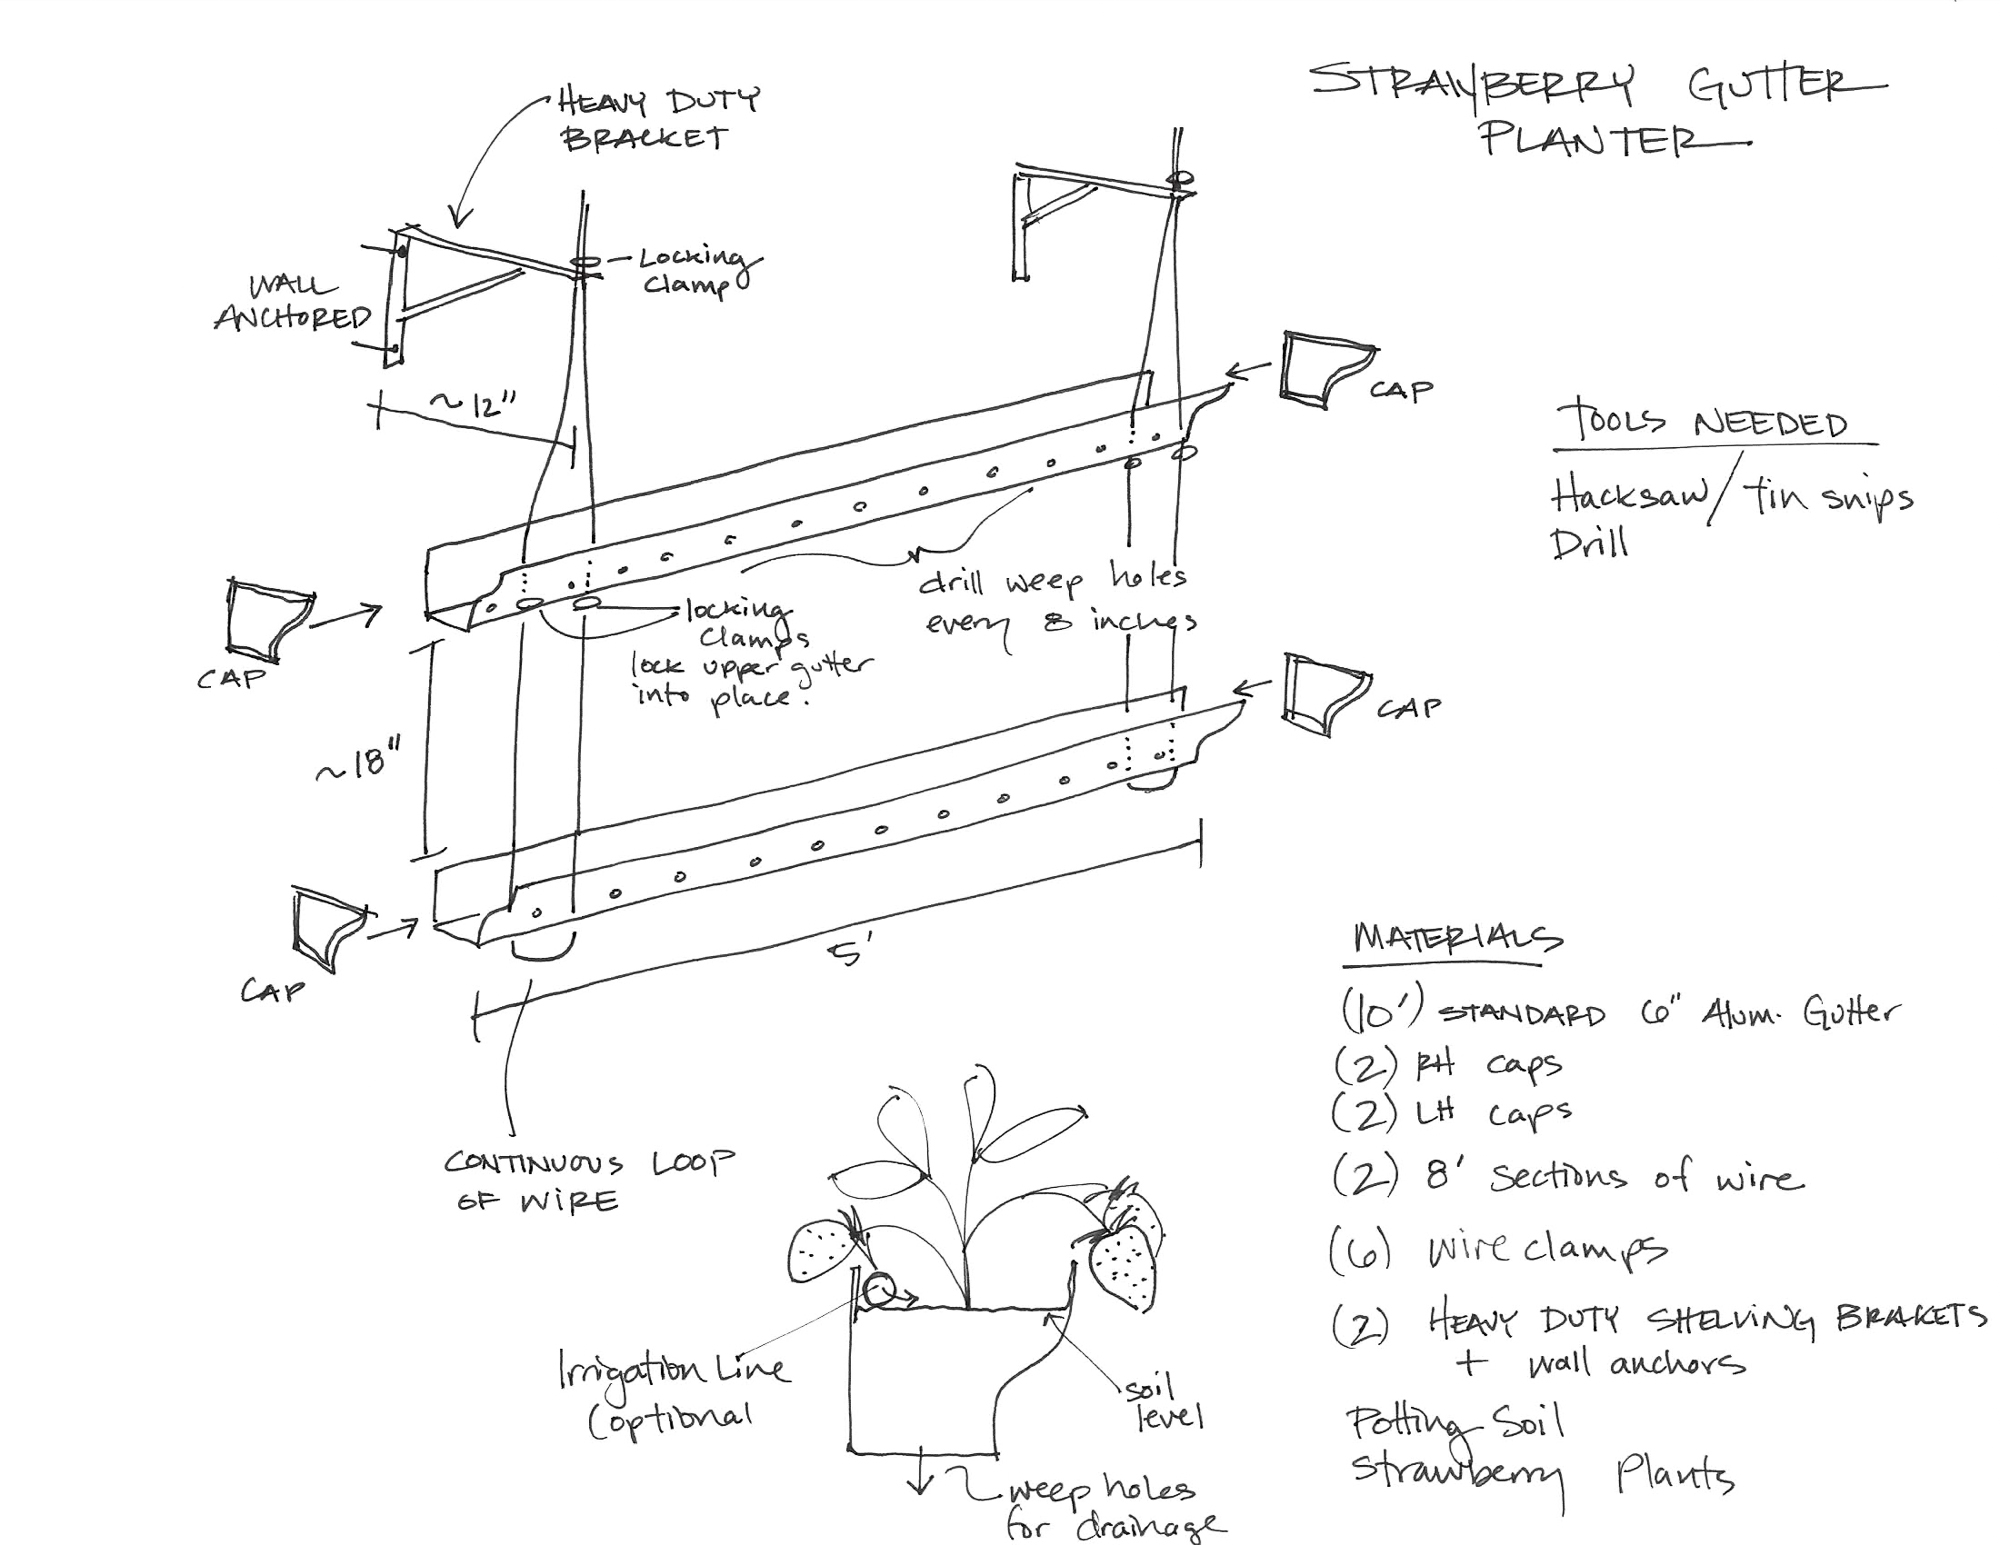
- one 10′ section of white aluminum gutter, standard 6″ deep
- 2 right-side gutter end caps to match the type of gutter you buy
- 2 left-side gutter end caps
- two 8′ lengths of sturdy, braided steel wire to hang the gutters
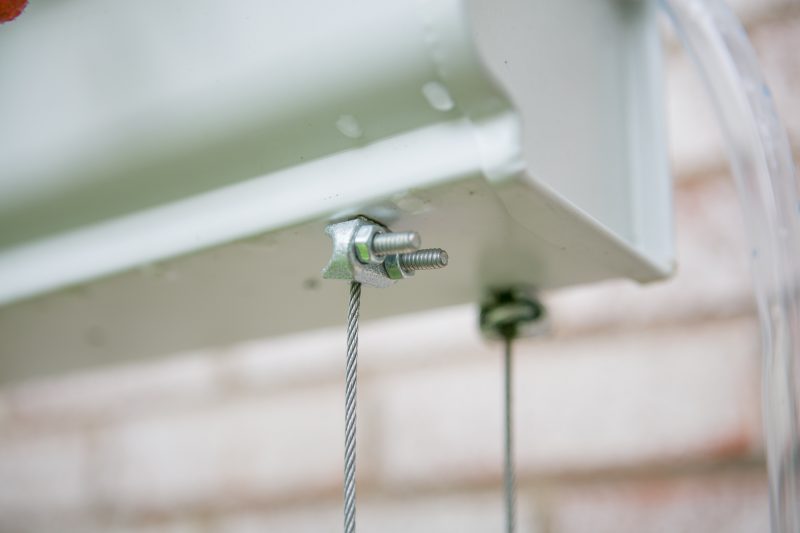
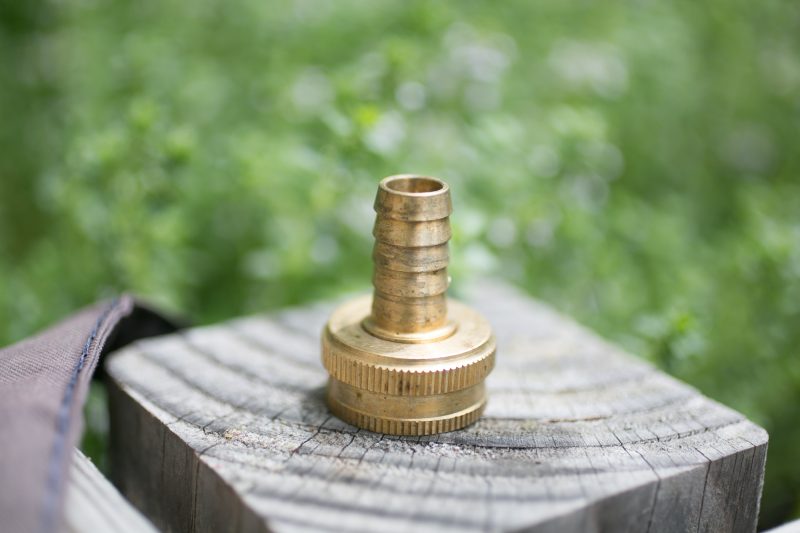
- six cable locks for the thickness of wire you purchase (See detail pic below)
- 2 heavy duty metal shelving brackets
- At least 4 wall anchors for the shelving brackets. If drilling into brick or mortar, you’ll need a hammer drill and concrete anchors.
- Potting soil, a lightweight mix would be good
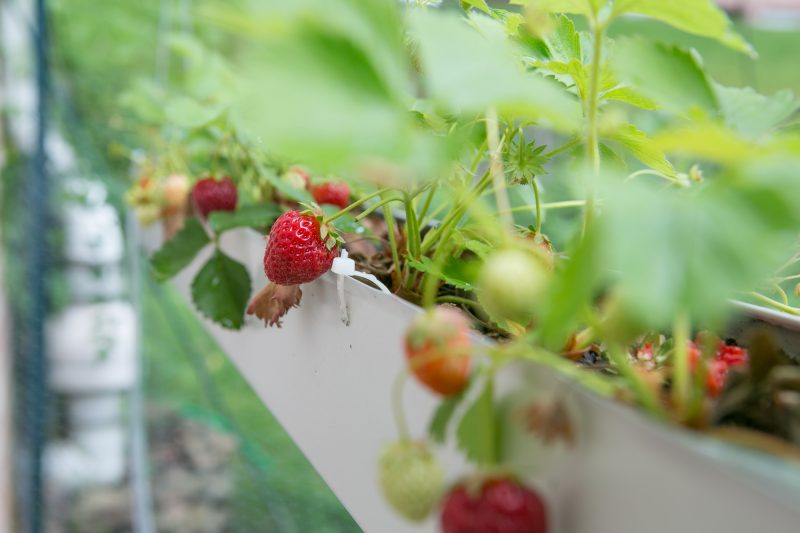
- strawberry plants (about 20 crowns total)
Once you’ve gathered your materials, these are pretty easy to assemble. Here’s how you do it.
Assembly:
- Cut the gutter in half to get two 5′ lengths. To fit this into a normal car, you’ll need to do this in the hardware store parking lot. So bring a measuring tape, pencil, and tin snips.
- Drill weep holes every 8″ in the bottoms of both gutters.
- Drill the cable holes about 6″ from each end, one at the front of the gutter, one at the back.
- Thread the steel cable through the gutters, placing the cable locks below the upper gutter. These hold it in place, and also assist in adjustment for leveling. The bottom gutter does not get any cable locks. We like having the upper gutter about 18″ above the lower one.
- Fit the end caps to each gutter.
- Fill each gutter about 2/3 full with lightweight potting soil.
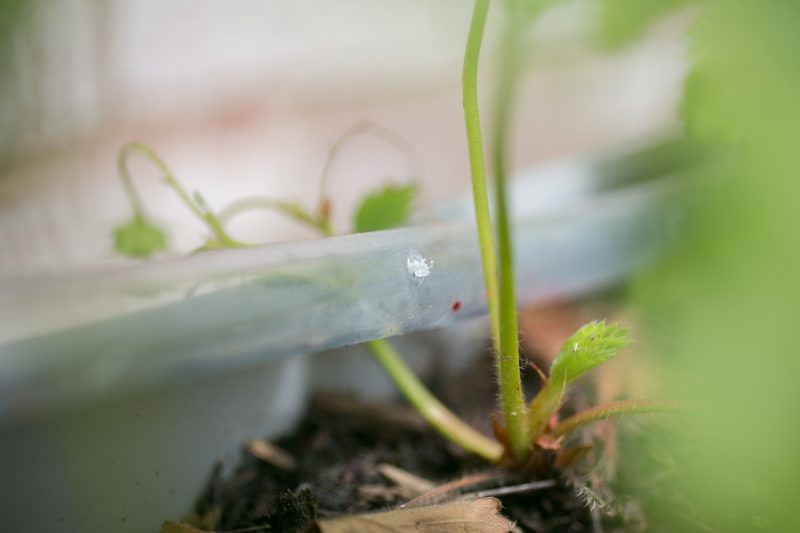
- Plant the strawberry plants, spaced evenly, about every 6″.
- Mount the brackets onto the desired wall. These must be sturdy brackets that are well anchored. When soaked, the gutters can get quite heavy.
- With the help of a friend, have them lift one side of gutter into place. String both loose ends of the cable through the shelving bracket. Place a cable lock around both lines and tighten to lock it into place. Repeat with the other side.
- That’s it. Water your strawberries, kick back, and wait for them to get ripe!
In case you’re a visual learner, I also created this little diagram of how they go together. (Click to see full resolution). I thought of a few more tools after I drew this up and scanned it, so see the list above for that part.

Irrigation
The last step, if you’re a perfectionist like me, is automating irrigation for the planters. This is a good way to prevent your strawberries from drying out and dying. Plus, if you go on vacation, you can set an automatic waterer to water them for 15 minutes every day. Don’t worry, overwatering won’t kill them (in a week, at least), but drying out certainly will.
Materials needed:
- Plastic tubing, no less than 15 feet. I believe ours is 1/2″ inner diameter.
- Hose pressure regulator / shut off valve
- Hose fitting with smaller bung for tubing
- Zip ties
- Lag bolt large enough to fit inside the end of the plastic tubing snugly (to plug the end of the line)
Tools needed:
- Utility knife
- Drill
Assembly:
- Fit the plastic hose to the hose fitting with the bung.
- Attach the hose to your pressure regulator or shut off valve. This is REALLY important, because you will need to regulate the pressure so that water doesnt squirt out the drip holes at full pressure. You will need to carefully adjust the valve to get the correct water pressure.
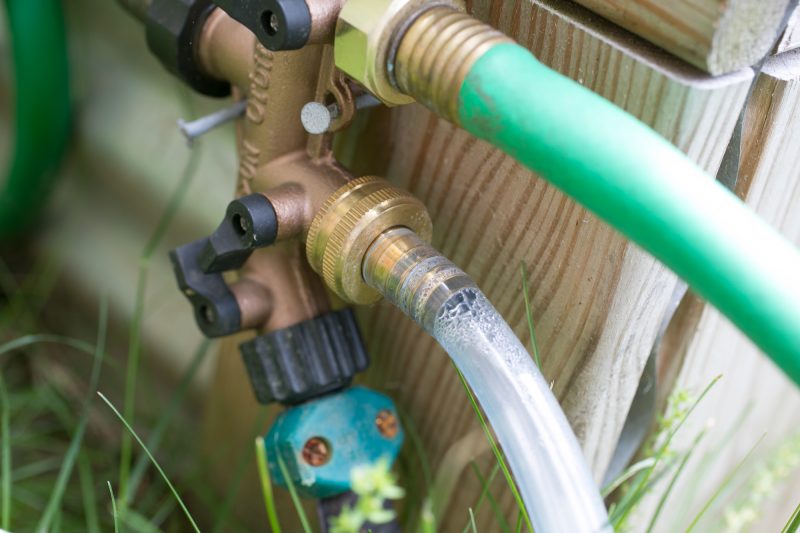
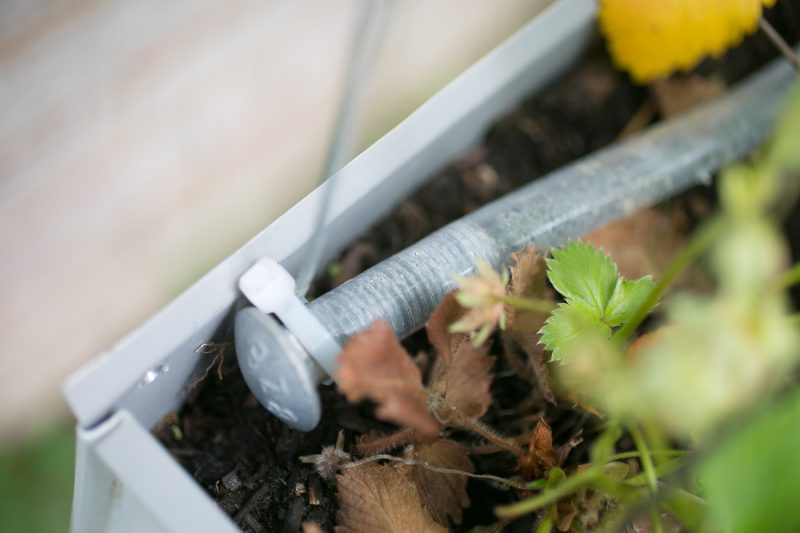
- Affix the hose to the gutter. Drill holes in the back edge of the gutter large enough to fit zip ties through. Loop the zip ties around the hose, and secure.

- Take the water line over the edge of the top gutter, affix to the cable with a zip tie, and train it down to the lower gutter.
- Drill tiny holes near your strawberry plants, for the water to drip out.
- Plug the end of the line with a large lag bolt. Secure to the hanging cable with a zip tie.
- Introduce some gentle water pressure, and adjust the shut off valve as needed to get a gentle but steady flow of water.
- That’s it!

I hope you all enjoyed this gardening tutorial! Let us know if you try it out, or if you have other suggestions that might be helpful. Happy strawberry planting!
Cheers!
Bill


Do you leave your water/hose hooked up all the time? I don’t have enough hoses for that! If you detach your hose all the time, do you have to re-adjust your regulator? Is the regulator attached to the gutter (it looks like it might be attached to the garden box below, so not sure). I am thinking about doing this on the side of my East facing garage. I have no trees. Think they’ll do ok there?