I know this website is supposed to be about food, but many of you have been asking me for far too long for a makeup tutorial. If you are new here, and don’t already know, before blogging Paleo recipes and writing cookbooks, I was a high definition makeup artist. Technically I still am a high definition makeup artist, but I don’t do makeup that often (for anyone other than myself) anymore. I have had the privilege of being the makeup artist for a few of your favorite Paleo bloggers, who also happen to be good friends of mine. That, plus doing my own makeup for photos and events, is really the only makeup I do these days.
If you follow us, just me, or Juli on instagram, you may have seen us having fun cooking and taking photos this week. Juli is in town visiting us for a special project she is working on, so stay tuned for that exciting news! While she was here we went apple picking, and had an impromptu photoshoot at the orchard. Juli asked me to do her makeup for the photos, to which I of course said “absolutely!”
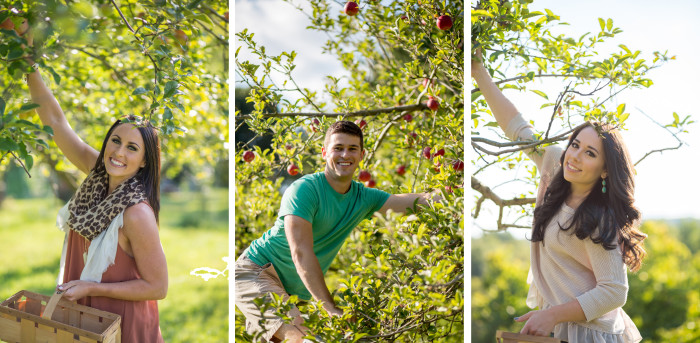
It was so beautiful, and so fun (except for the fact that we looked pretty ridiculous walking around the orchard hills in tall booties).

We were blessed with perfect fall golden hour light, which made for dreamy photos.

Since Bill had just ordered us some fun studio lighting, Juli and I decided to do a video makeup tutorial of the look I was doing on her. I’m still pretty new at the whole beauty tutorial thing, and I have a really hard time talking while painting faces, so I apologize for how often I pause to figure out what I want to say. When I was in my advanced painting classing in high school, the teacher always yelled at us if we were talking while painting. She would say “There is too much talking, so I know you aren’t working. That’s different sides of your brain, and it’s not possible to do both!” I think that might be why so many makeup tutorials have voice over to explain what’s happening, it’s seriously hard to talk and paint at the same time!
For this look, I did NOT use all mineral makeup, but I’ve listed mineral options to get this same look. I always do mineral/gluten-free base (concealer, foundation), as well as mineral contour/bronzer, and blush. I also make sure that anything on the lips is at least gluten-free, but optimally mineral/non-toxic as well. I don’t fuss too much about the eyes, because it can be hard to find eye makeup with good pigmentation that is mineral-based. There are some great colors out there, but sometimes you just need some designer makeup for a really glam look. I also think that having the mineral eyeshadow base is helpful when using conventional eye shadow, so that’s why I don’t worry about using mineral on the eyes. Of course if you wear makeup every single day, or are very sensitive, then I would suggest getting mineral eye shadows for everyday wear. I don’t wear makeup unless I have to, so I don’t worry about those few instances where it’s not completely clean makeup.
The mineral makeup I use is Jane Iredale. I have used it for 11 years, and it is always my choice of makeup for print and video. It really makes your complexion flawless, has full coverage, and is matte finish, so it wont make you look shiny on camera. Some shimmer is great, but too much is not cute. You’ll just look sweaty. Not all of the Iredale products are gluten-free, but most are. They have that information listed on the website, so it’s very clear which products to avoid if you are sensitive to gluten. For now, Jane Iredale is the only mineral makeup I recommend for on camera use. When I find something I like better, then I will let all of you know!
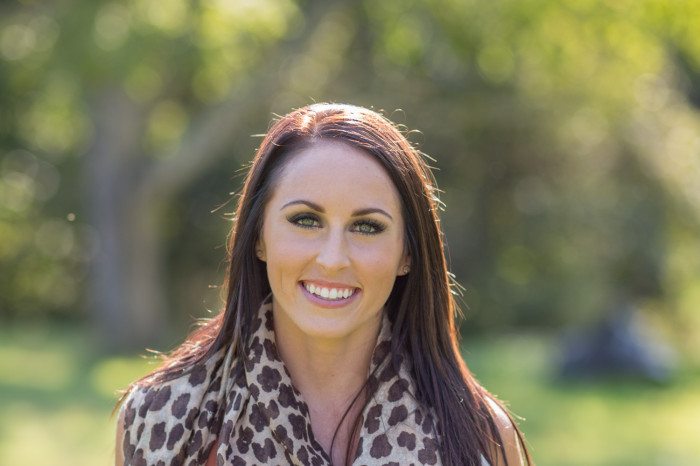
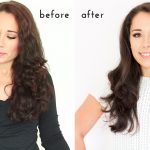
The look I wanted to do on Juli was a blue smoky look with gold highlight, and shimmer. Since the eyes were dramatic, I wanted to keep the lips soft and neutral. This was a really fun glam look for the shoot. It looked stunning on her, and she loved it!
↓↓ Here’s the video tutorial! ↓↓
Get Juli’s look:
The Face
Concealer: Circle Delete #2, applied with a MAC 195 concealer brush
Foundation: PurePressed Base in Golden Glow mixed with Amazing Base in Warm Silk (I applied the pressed foundation, and then went over some parts of her face with the lighter shade in the loose minerals to make sure I had her skin tone matched perfectly), pressed powder applied with The Handi Brush, and Amazing base applied with Chisel Powder Brush
Contour: PurePressed Base in Coffee, applied with a MAC 109 small contour brush (I actually just used a MAC powder brush for the contour, because I like it, but I’d suggest using an actual contour brush instead)
Blush: Rose Dawn Quad Bronzer, applied with a MAC 116 blush brush
The Eyes
Base: NARS Soft Touch Shadow Pencil in Dark Rite, applied with a Mac 195 concealer brush
Shadow: The Naked Palette in Gunmetal, applied with a MAC 217 brush
Contour: Naked Basics 2 in Frisk, applied with Jane Iredale crease brush
Brow Bone: Naked Basics, mixed together Foxy and W.O.S, applied with a MAC 217 brush
Outer “V” contour: Naked Basics 2 in Undone, applied with a MAC 219 pencil brush
Liner: Make Up For Ever Artist Liner in M-10 (Matte Black), smudged with the MAC 219 brush
Gold highlight for the lid: Make Up For Ever Artist Liner in ME-70 (Metallic Bronze)
Gold highlight powder for over the gold pencil: Naked 2 Palette in Half Baked, applied with a MAC 242 shader brush
Shimmer highlight for the brow bone: Naked Basics in Venus, applied with a MAC 217 brush
Brows: Tarte Amazonian Clay Waterproof Brow Mousse in Rich Brown, applied with the brow brush that comes with it
Mascara: Tarte Gifted Amazonian Clay Smart Mascara in Black
Lashes: Ardell Fashion Lashes, 102 Demi
Lash Adhesive: Georgie Beauty Non-toxic Adhesive
Liner Powder: Naked Basics in Crave, applied with a MAC 208 angled brow brush
The Eyes in a Mineral Option
(Disclaimer: I did not test this look with mineral shadows, so these are the colors that are closest to what I used. It will not be exact.)
Shadow Base: Jane Iredale Circle Delete (this is a concealer, but it’s one of the best bases for shadow)
Shadow: Jane Iredale PurePressed Shadow in Blue Hour
Brow Bone: Jane Iredale PurePressed Shadow in Bone
Contour: Jane Iredale PurePressed Shadow in Cappuccino
Outer “V” Contour: Jane Iredale PurePressed Shadow in Smoky Grey
Brow Bone Highlight: Jane Iredale PurePressed Shadow in Oyster
Liner: Jane Iredale Eye Pencil in Basic Black
Gold Highlight for the Lid: Jane Iredale 14-Karat Gold Dust Shimmer Powder in Gold
Brows: Jane Iredale Bitty Brow Kit in Brunette, or Eye Pencil in Basic Brown
The Lips
Liner: Jane Iredale Lip Pencil in Spice, fill in the entire lip
Gloss: NARS Lip Gloss in Greek Holiday, apply all over the lips, or just in the center for highlight
We put together some of the outtakes too…
Xo,
Hayley
You might also enjoy:
Bye Bye Rosacea, Glowing Skin for the Bride to Be
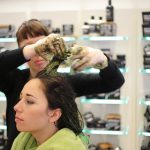
Henna: Natural Hair Coloring without the Use of Chemicals


Your pictures are AMAZING! You guys belong in a magazine or something. Enjoy the fall weather! Can’t wait till it hits Florida! Thanks for the tutorial! 🙂
Love this tutorial! I would definitely be interested in seeing more 🙂 I feel like everything I was taught when I first learned how to wear make-up is either outdated or just flat out wrong. I would even love to see some more basic everyday eye looks and simple tips for applying base really well. Stacy convinced me to switch to the Tarte mascara and I love it! I’ve also been thinking about taking the plunge and switching to Jane Iredale, but I was nervous about which base to try, but you cleared that right up with this tutorial! Thank you so much! <3
Thank you for your two recent videos. I would love to see more…full makeup application with Jane Iredale….your favorite skincare and haircare….I love all things skin, hair and make up and it would be so great to see more natural options from a reputable source such as yourself. Thank you for all you do.
There will be more to come! -Kara